Jobs
A job is a process of organizing and managing a project or set of projects under a particular cluster and also being able to monitor the status and progress of the workflow. A job is a non-interactive way to run an application in a cluster. it is a data analysis process that you can run on a scheduled basis or immediately.
You can perform ETL(extract, transform and load) processes on a set of schedules. you can run your job immediately or periodically with a fast and easy-to-use scheduling system.
Learn how to create and manage Jobs easily.
Create Job
To create a new job for a project, click on “Job” at the top of the navigation bar and click “Create Job” at the sidebar
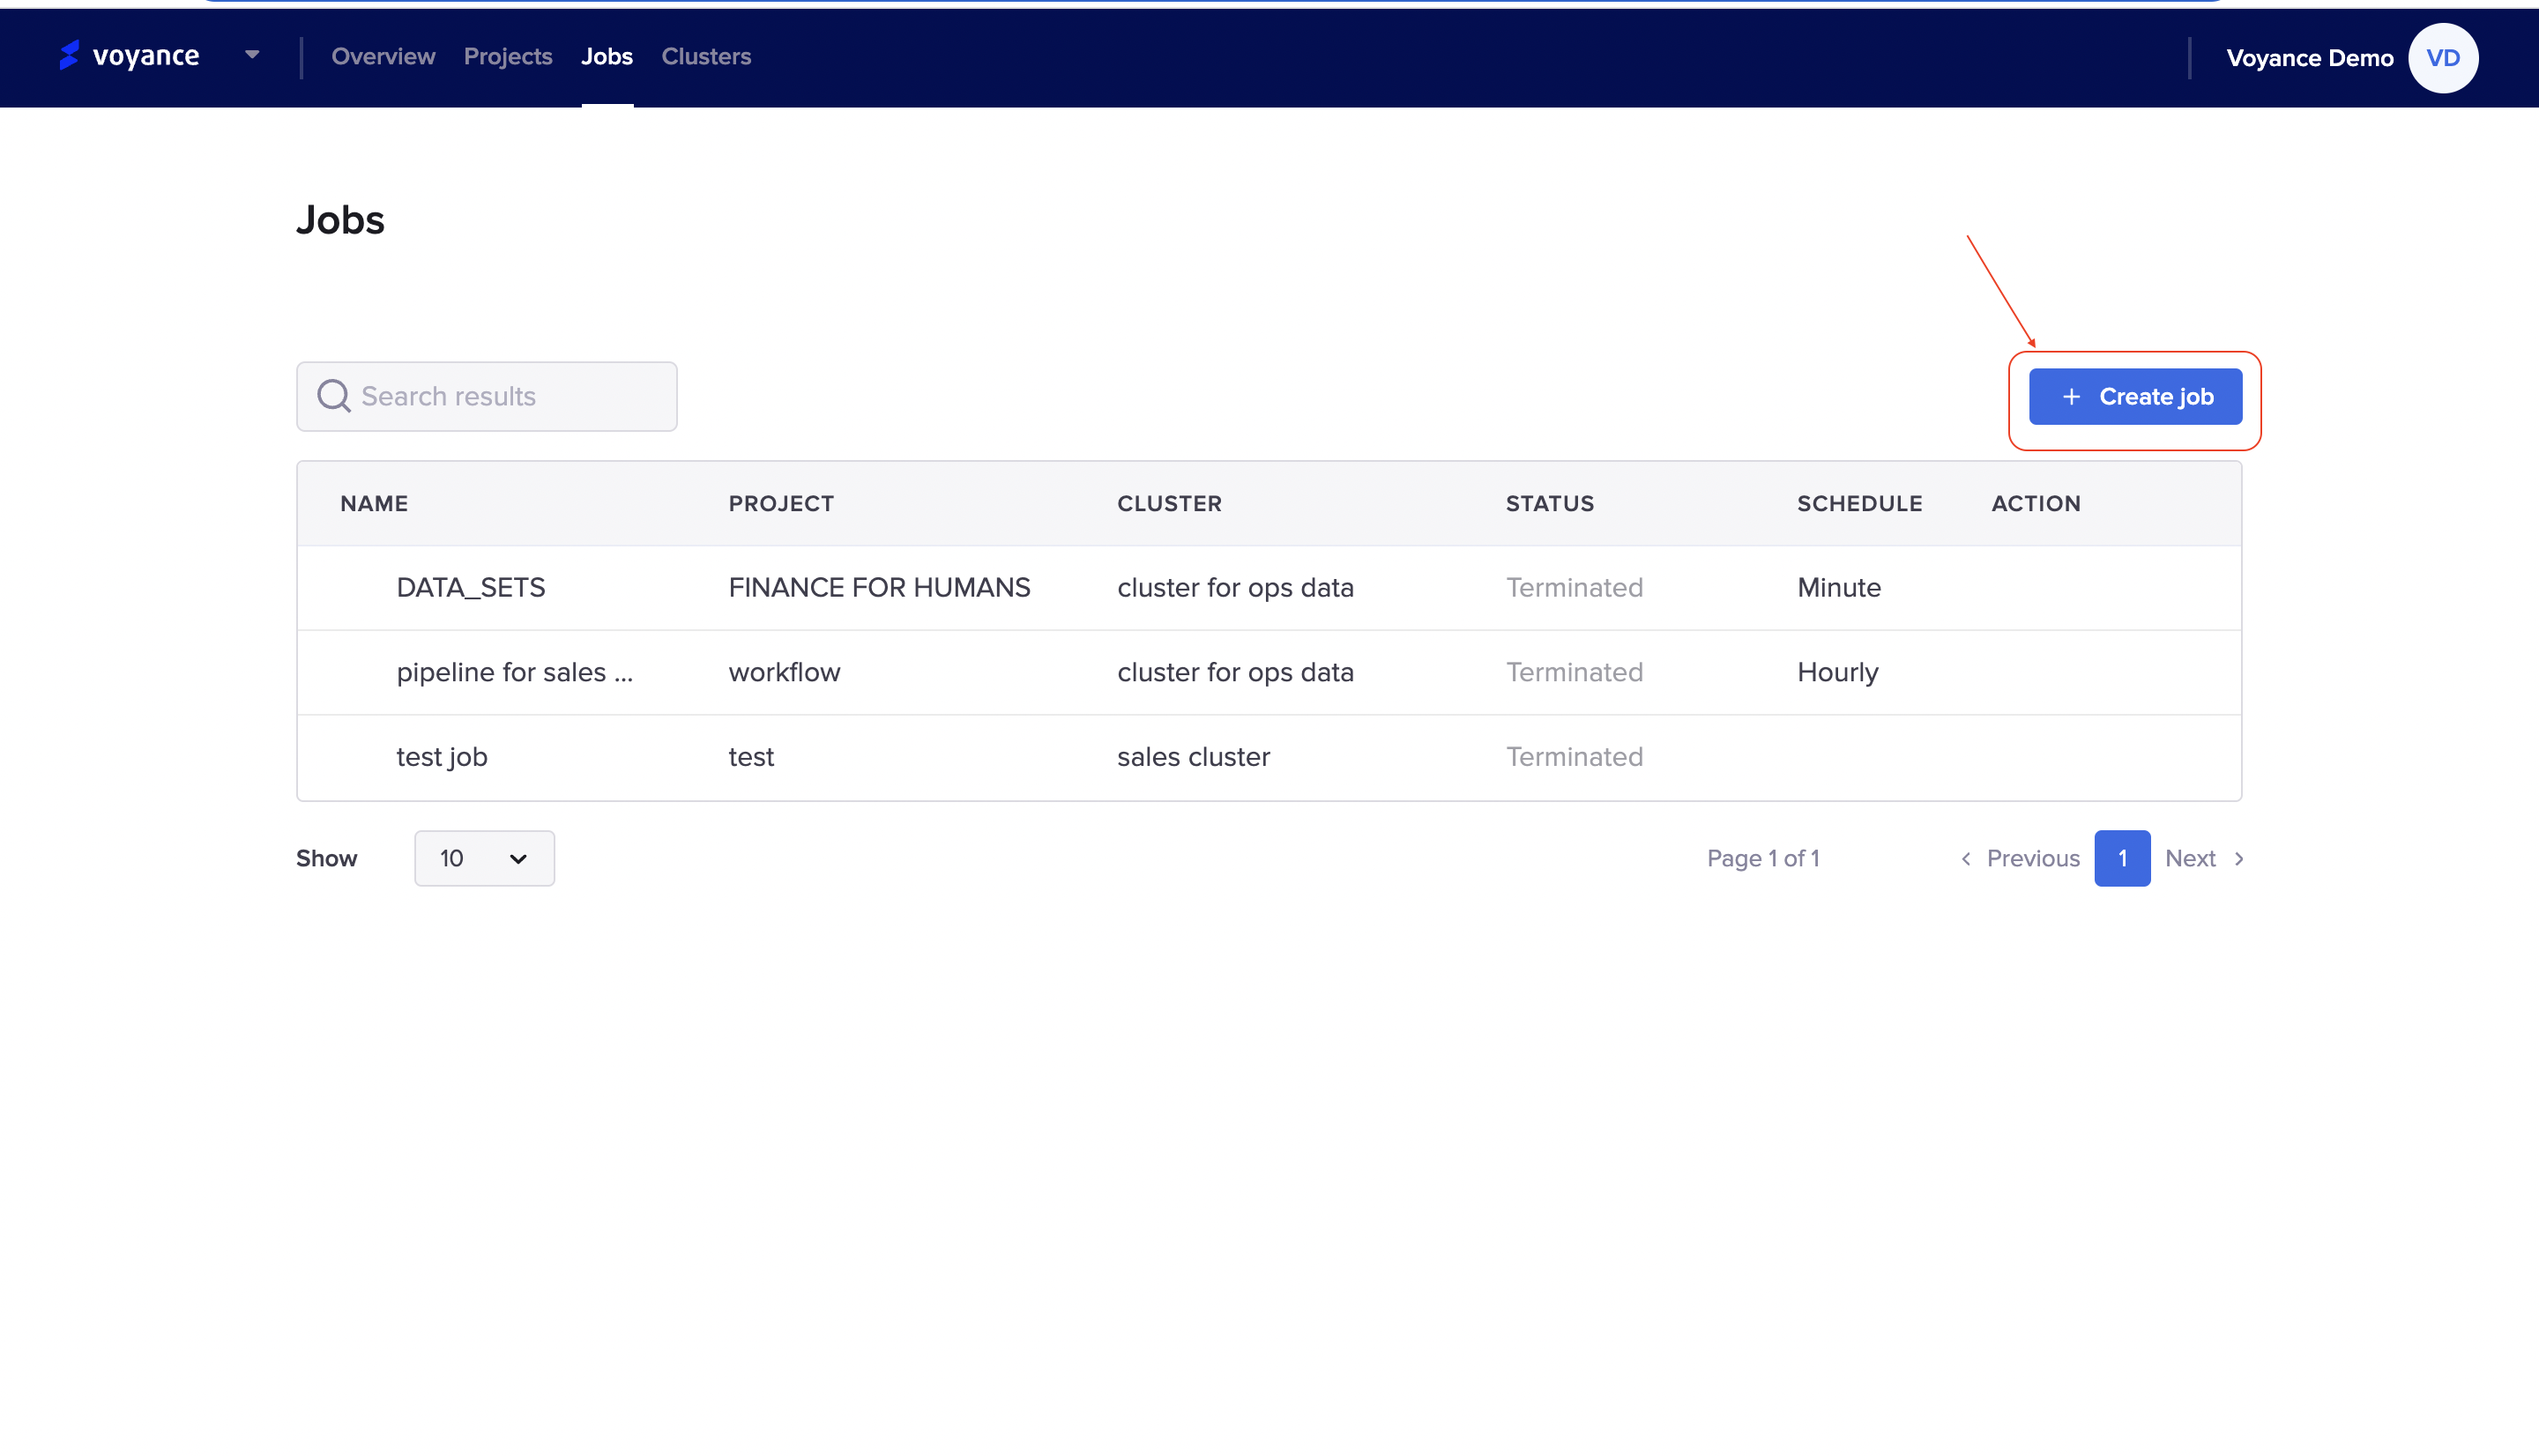
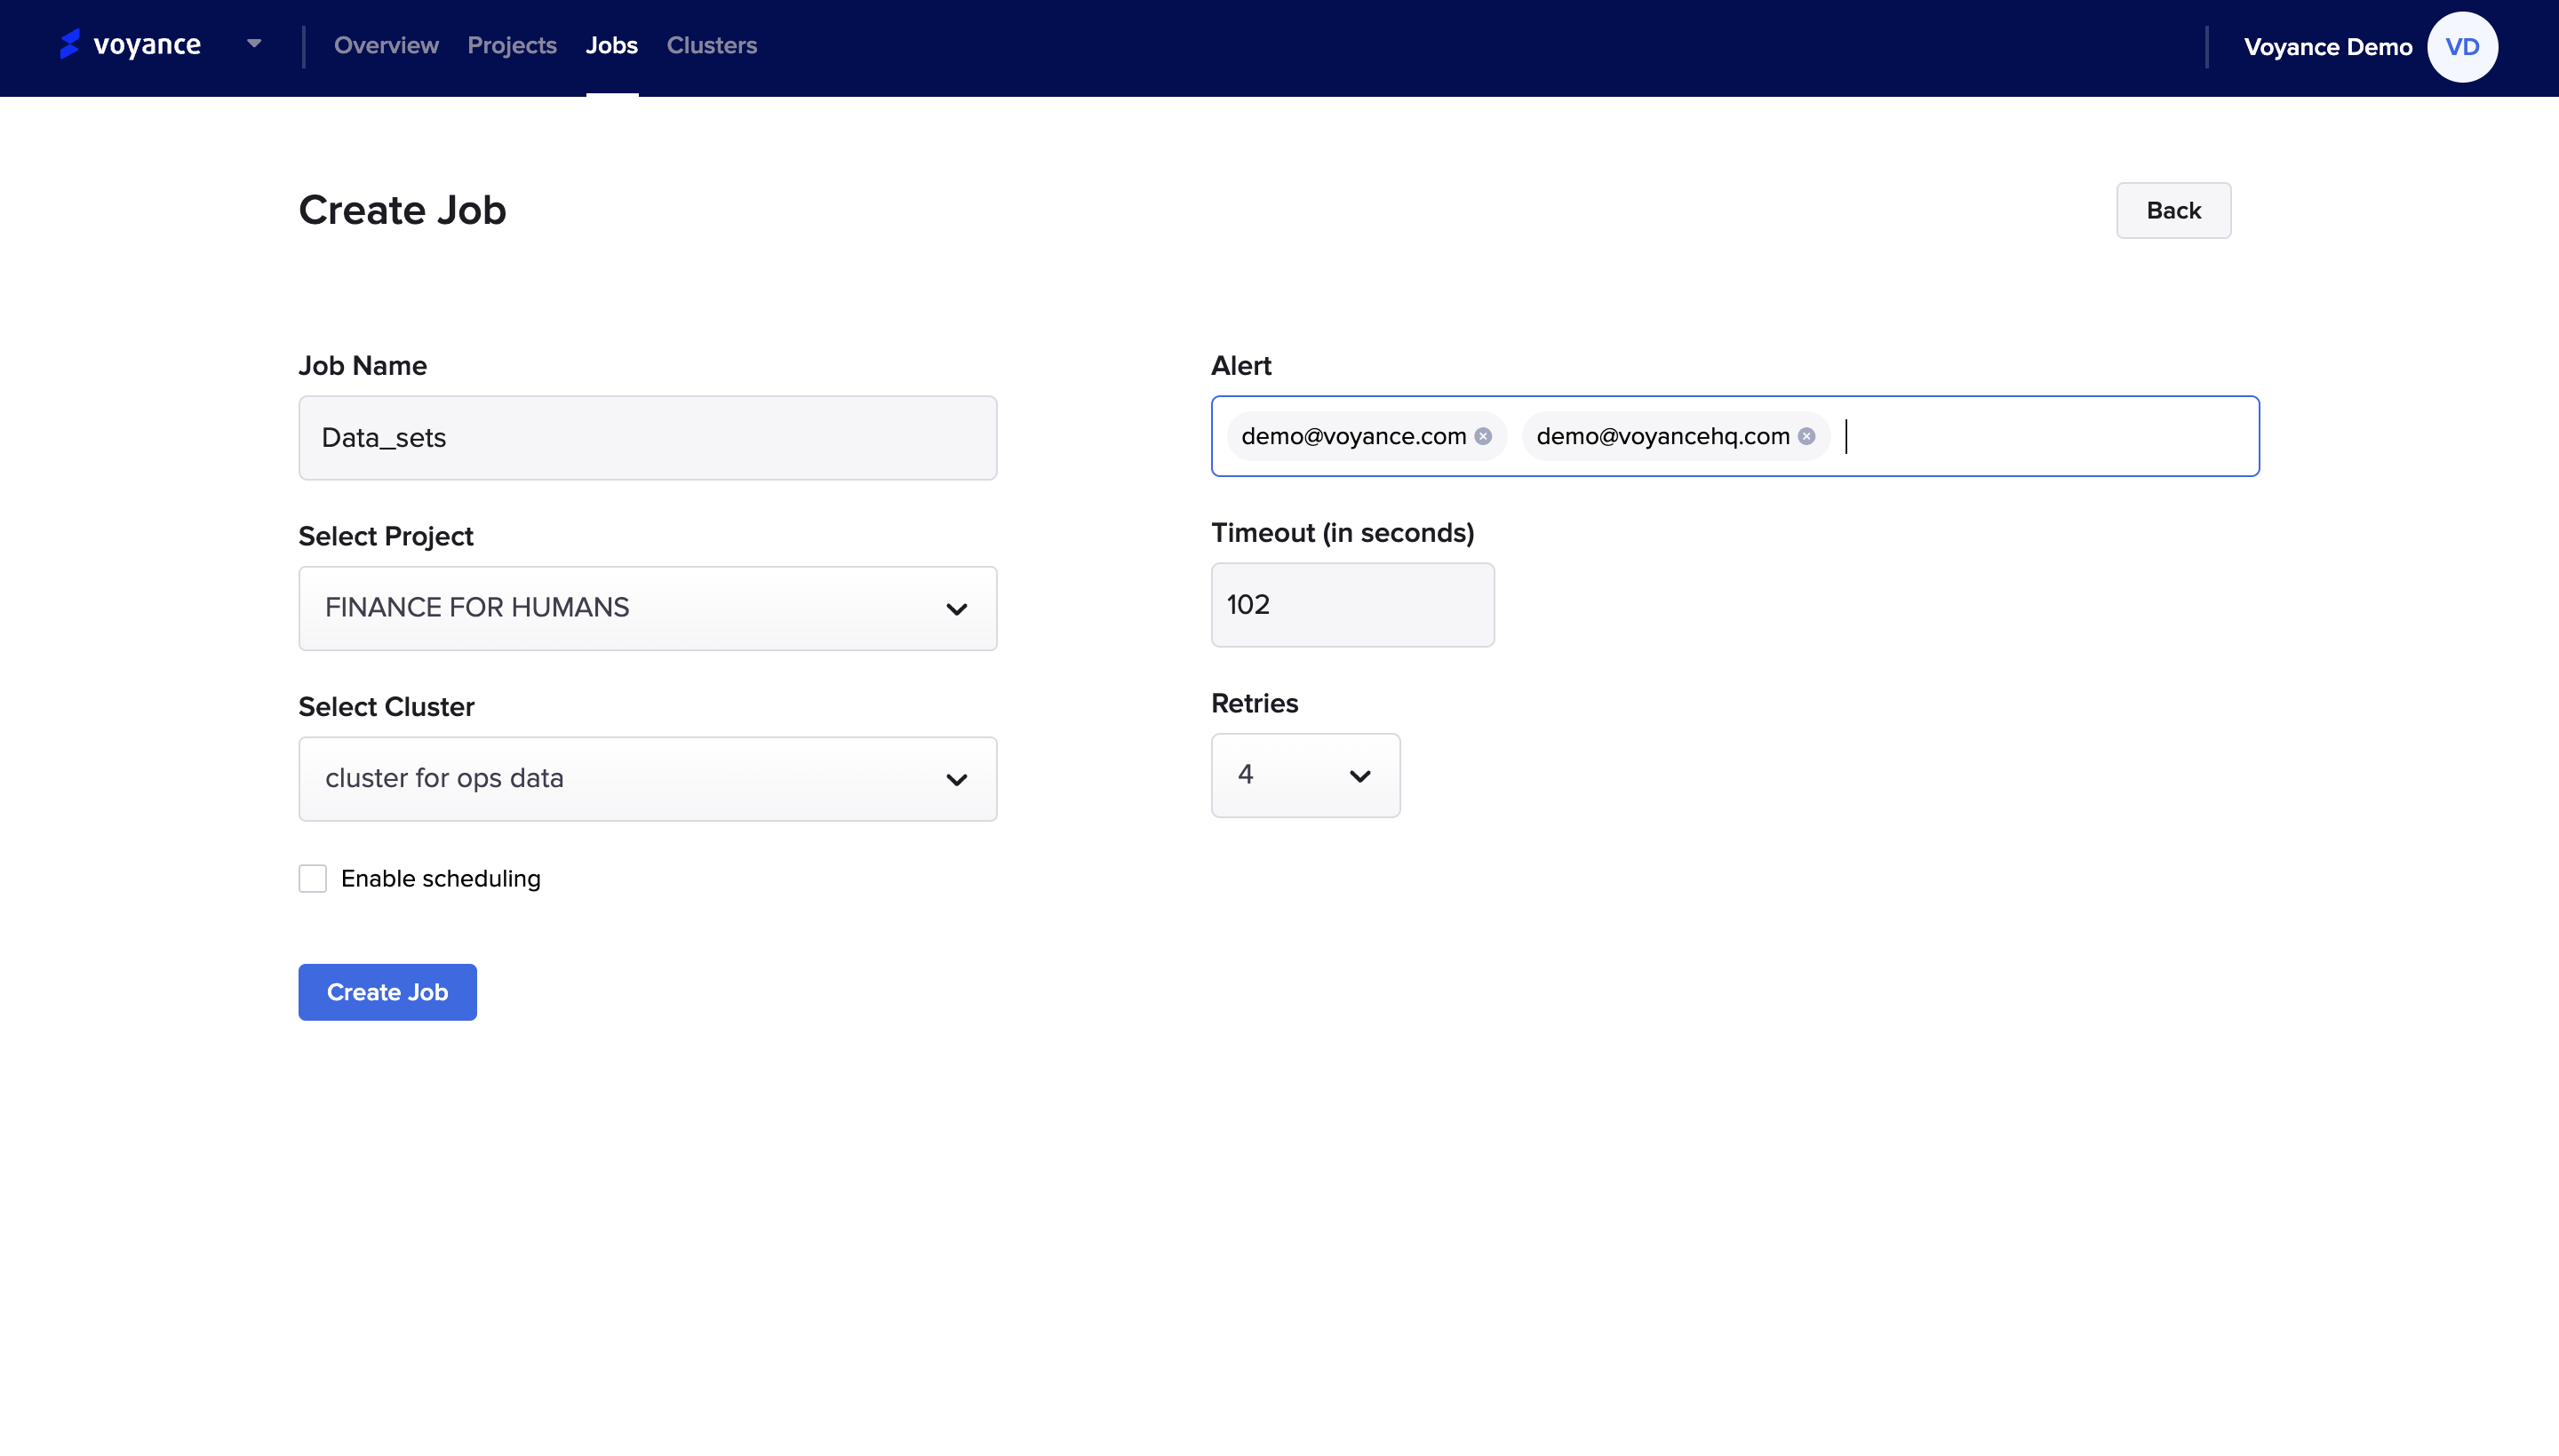
fill in the following fields and click “Create Job”. The Job tab appears with the create job dashboard. The following create job dashboard contains the following parameters
Job Name: Enter a name for the job in the job name field
Select the project you want your job to run on, and click on the drop-down to select from the project created.
Select a cluster where you want to job run. click on the cluster drop-down to choose a cluster.
Enter email addresses to receive alerts updates concerning the job events. These are email alerts sent in case of job failure, success, or timeout. You can set alerts for job start, job success, and job failure (including skipped jobs), providing multiple comma-separated email addresses for each alert type.
Timeout is the cessation that automatically occurs when a predefined interval of time for a job has passed. The interval of time (timeout) for a job is in seconds. The timeout interval depends on you. Click on the drop-down arrows to determine the timeout either increase or decrease the timeout.
Select the number of retries you want the job to run. Click on the drop-down to select the number of retries for the job.
Enabling Scheduling
For any job created, you can enable a schedule for that particular job to determine the interval for the job and running time for the job. The schedule determines how long it is going to take a particular job to run. To define a schedule, click on the "Enable scheduling checkbox" to activate the process for your job.
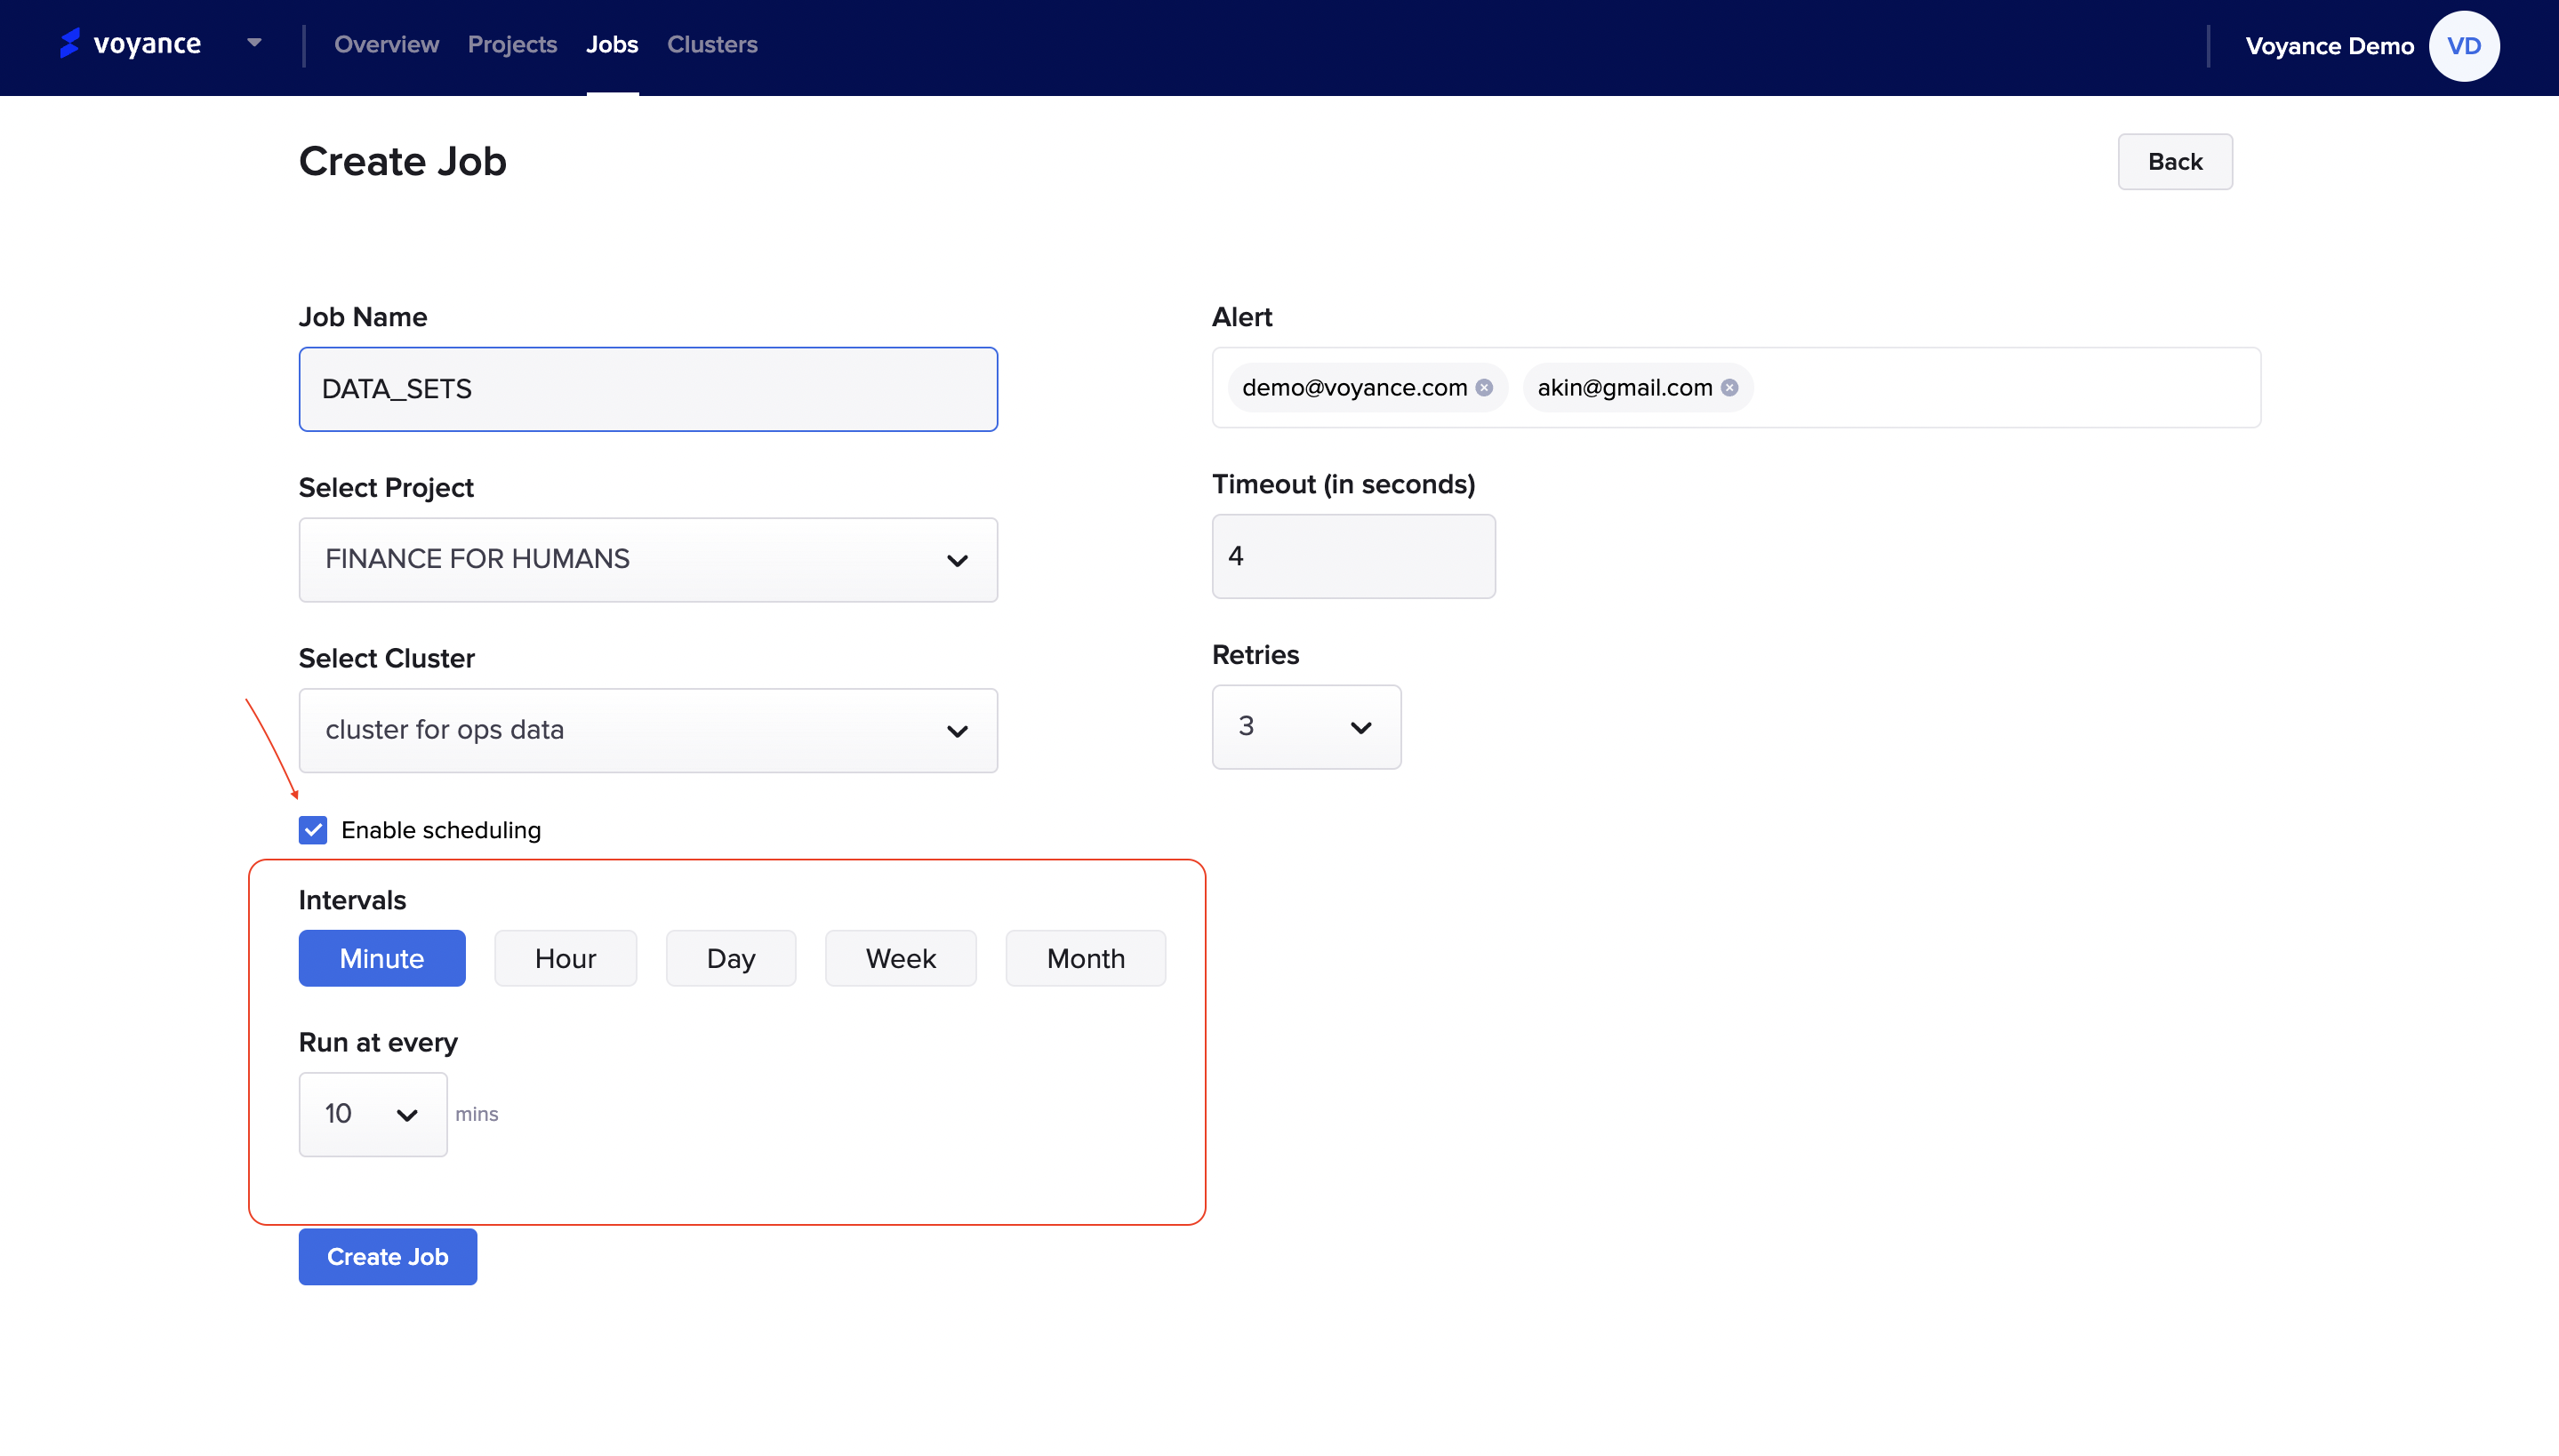
You have the option of settings a time interval for your job or every job, the following process can be defined by the following parameters or fields.
Minutes: Define how many minutes you want your job to run at every period of time. To specify the number of minutes, click on the "Minute" tab, and click on the drop-down under the "Run at every" to select the number of minutes for the job run.
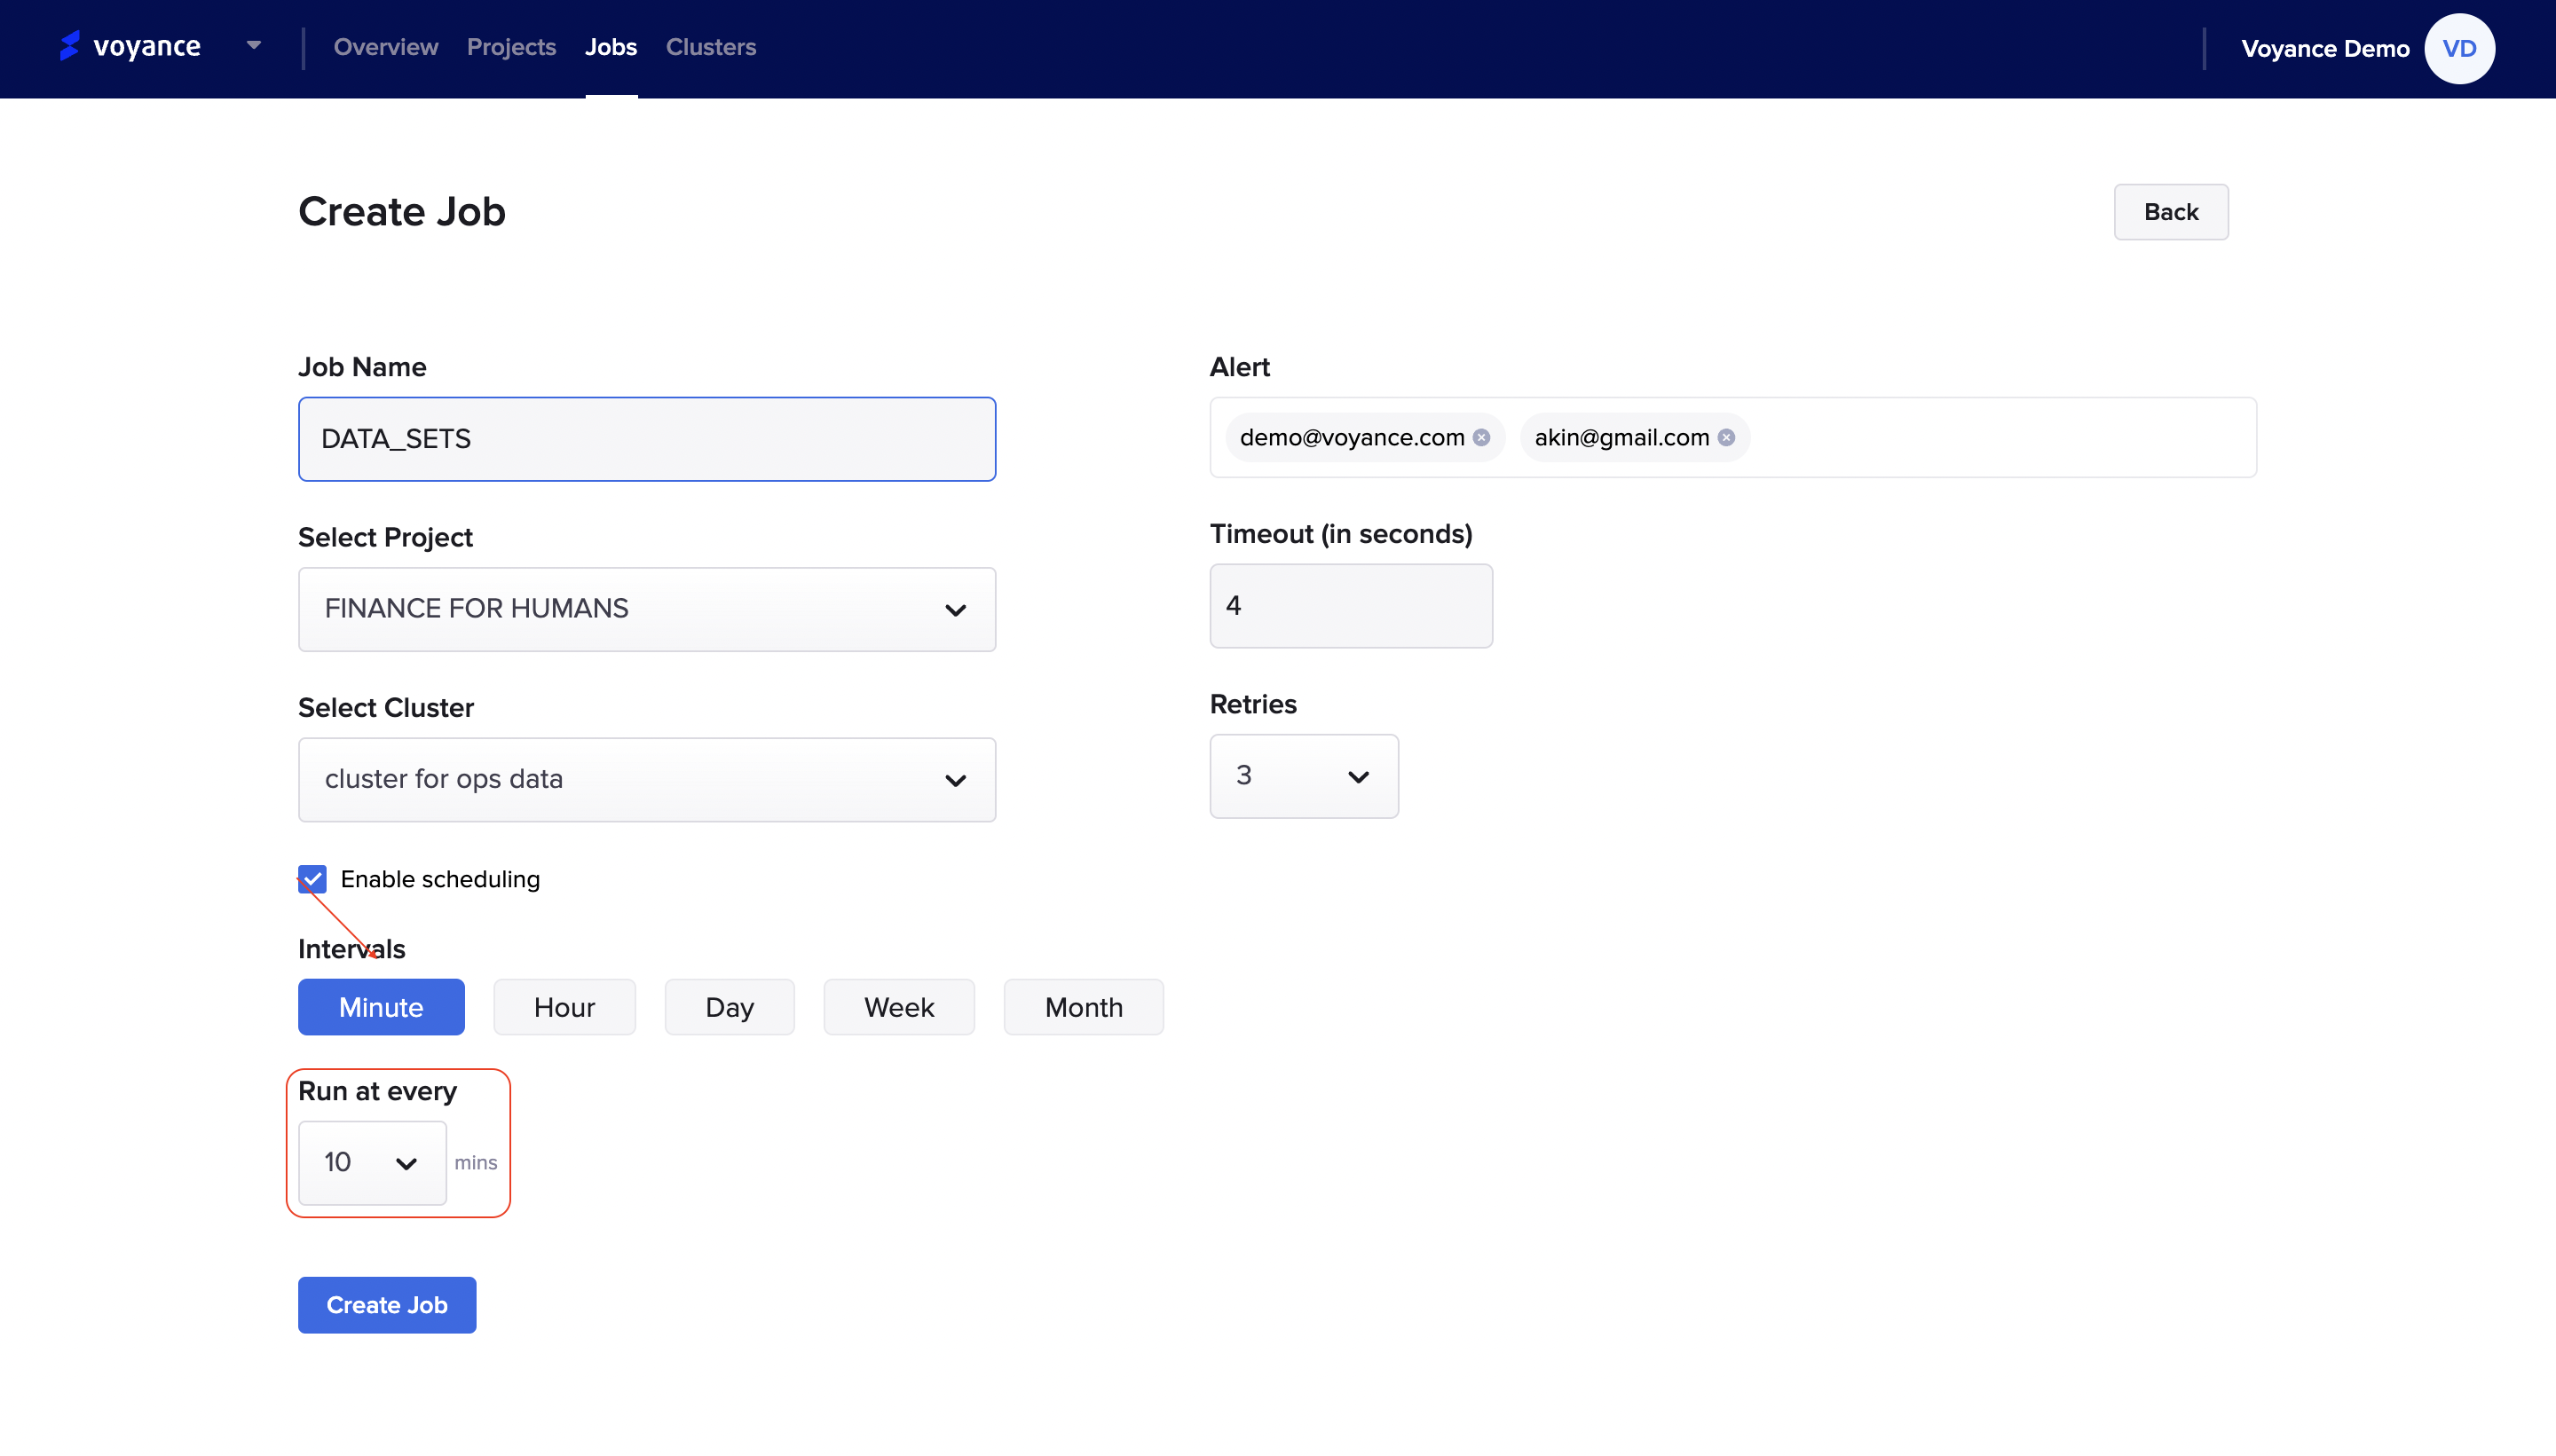
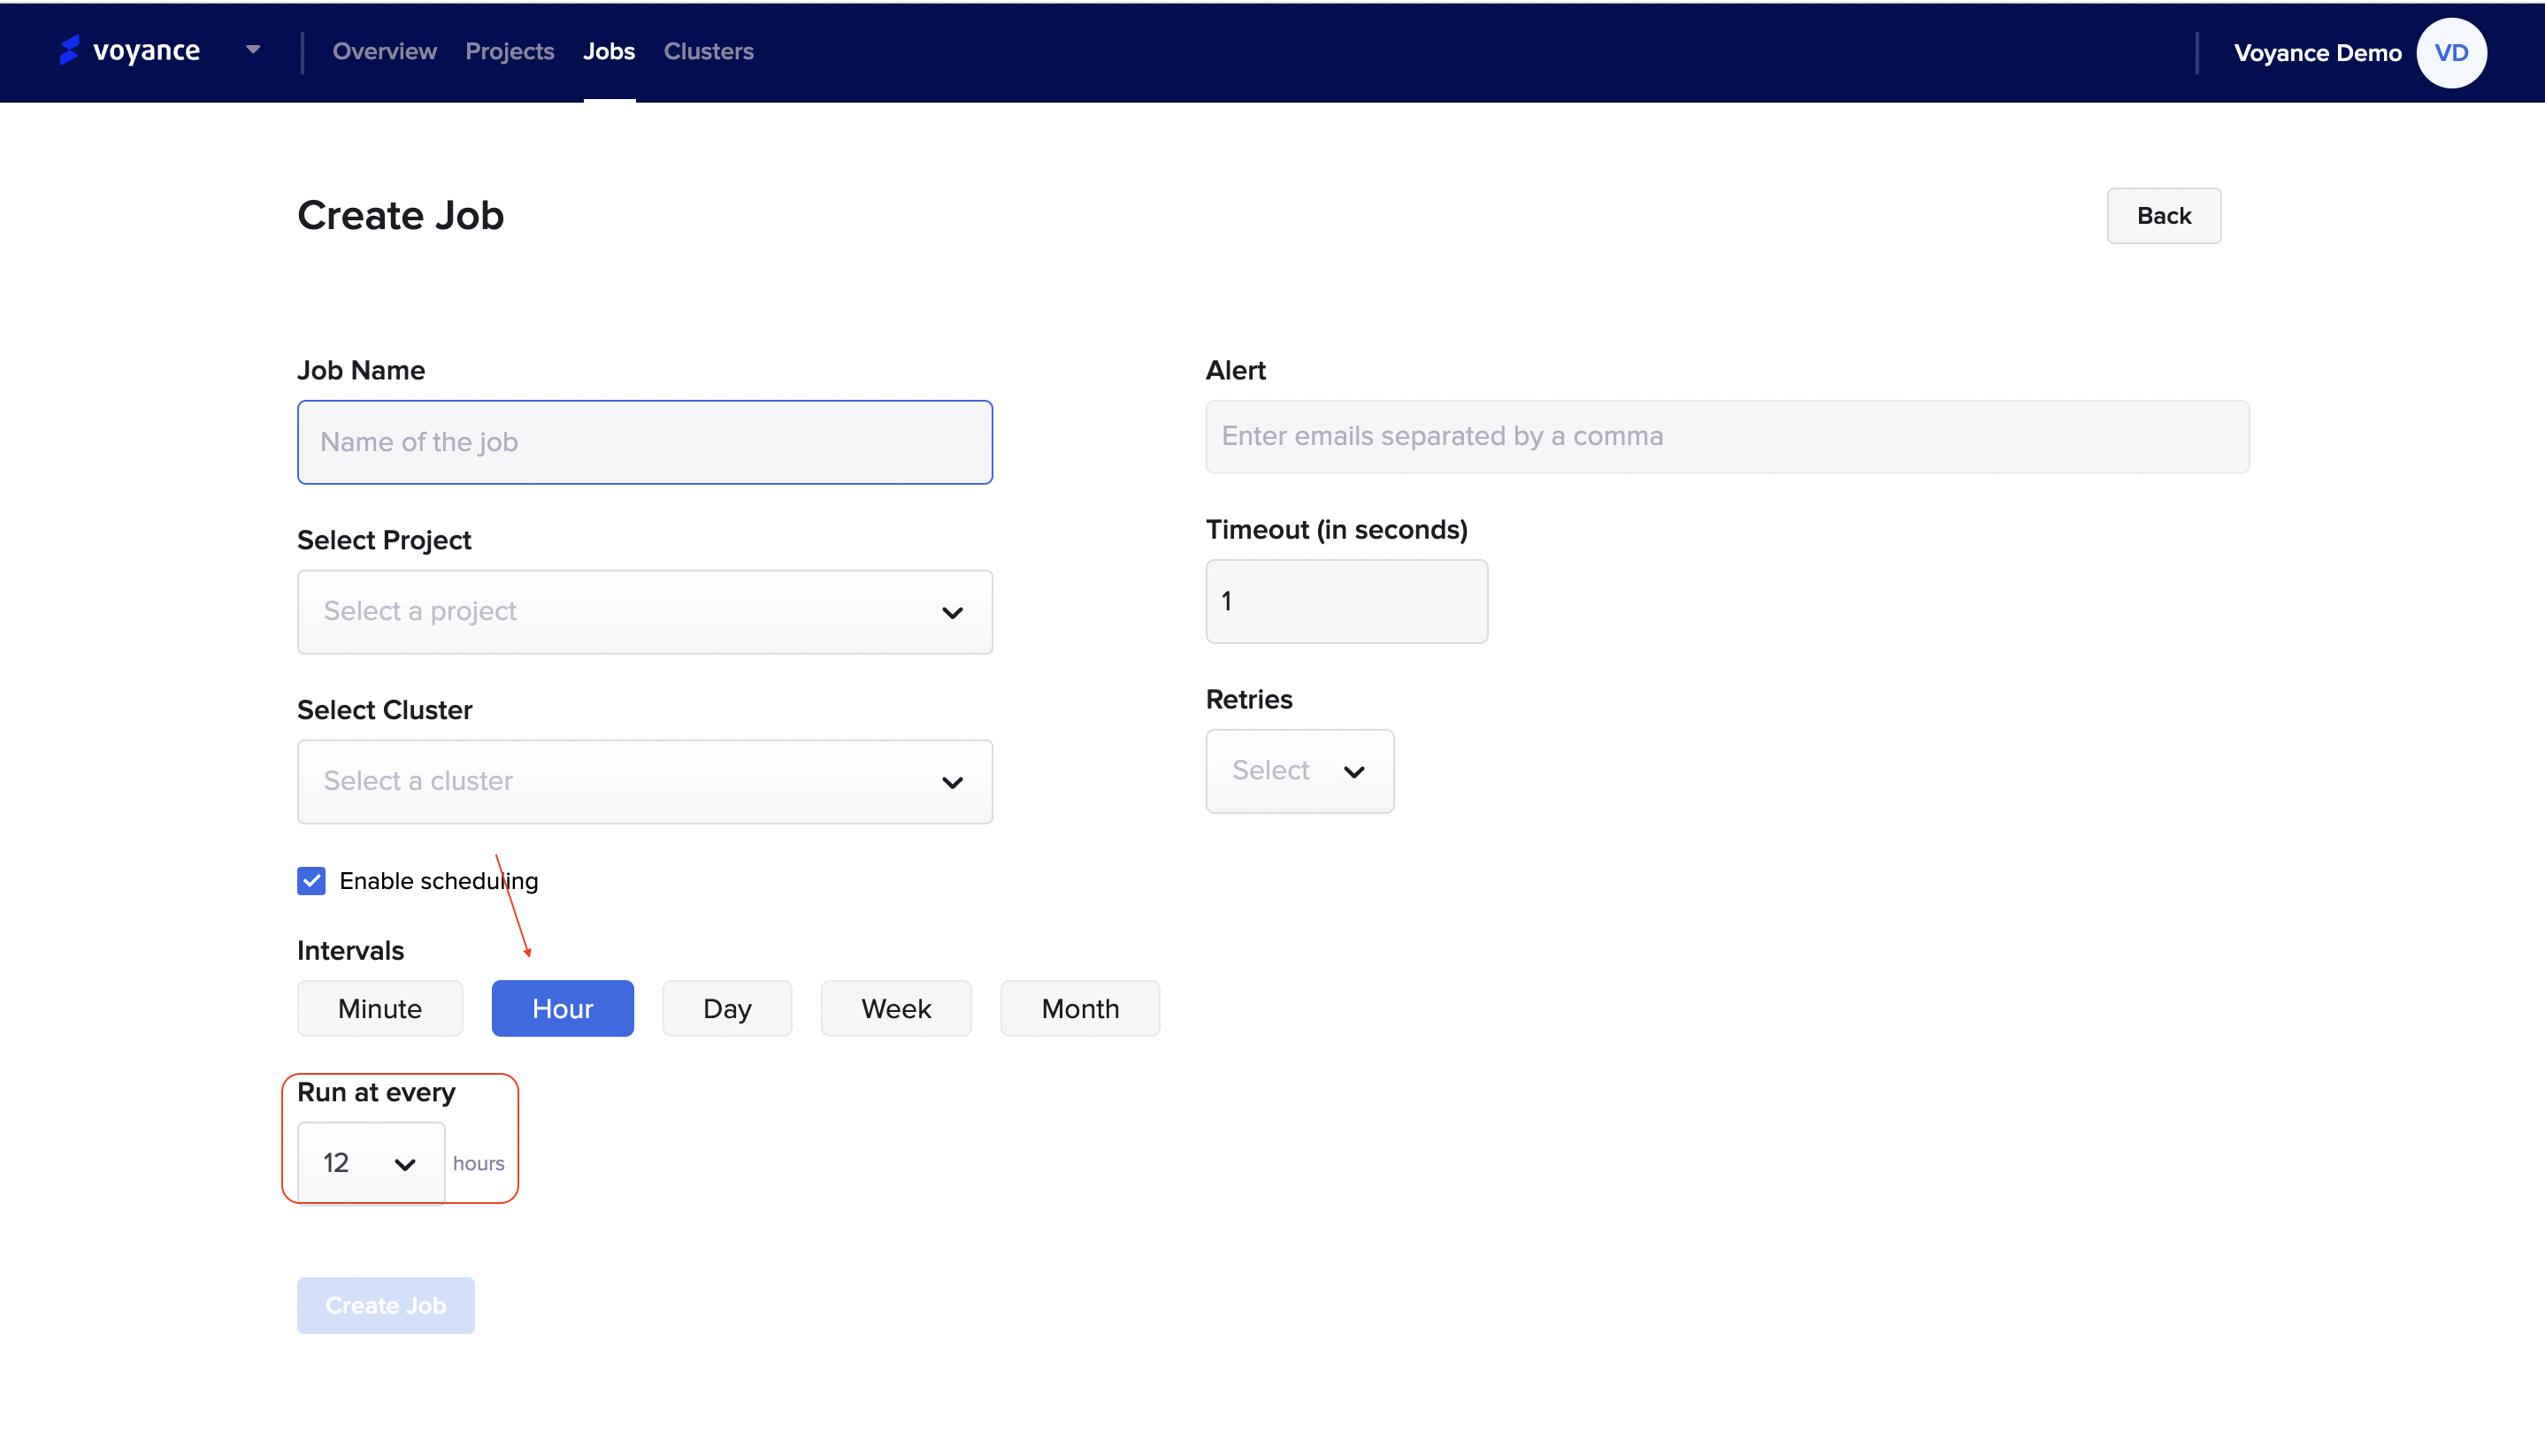
Hours: Identify the number of hours you want your job to run at every period. To specify the hours, click on the "Hours" tab and click on the drop-down under the "Run at every" to select the hours you want your job to run.
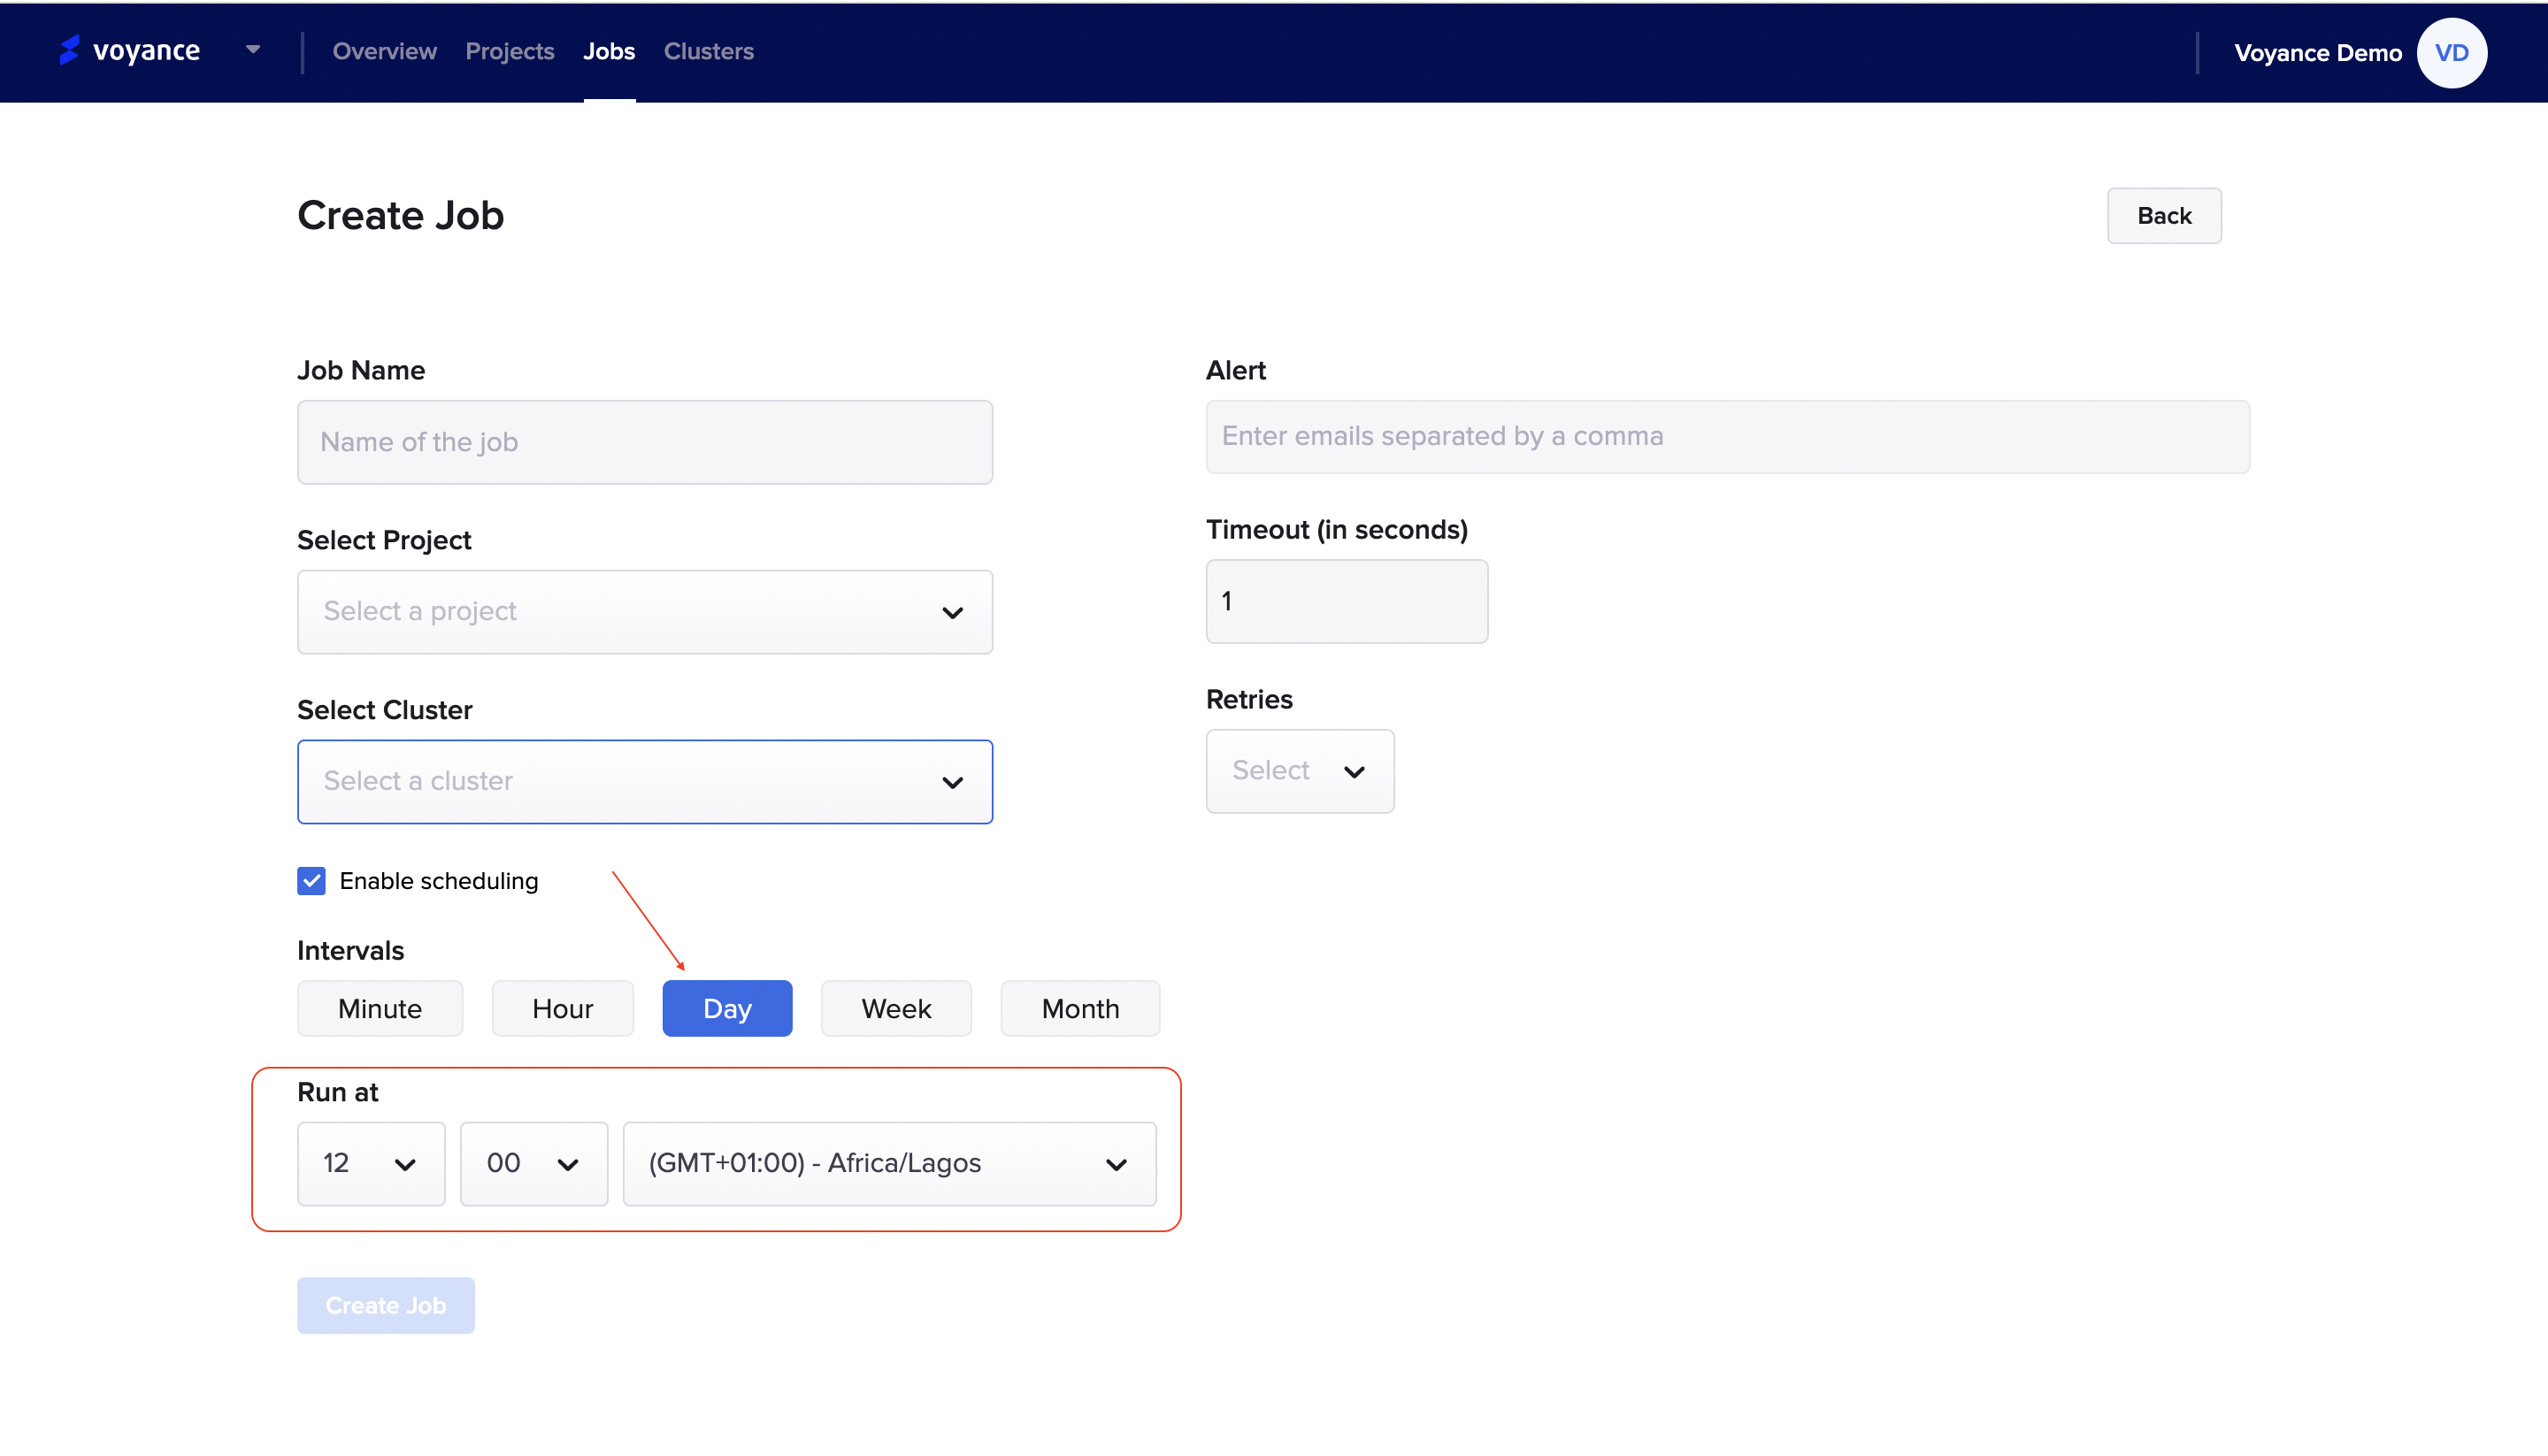
Day: Specify the period, the starting time and what timezone you want to use for jour run. Click on the "Day" tab and click on the drop-down(s) under the "Run at" to define the time and zone for the job run.
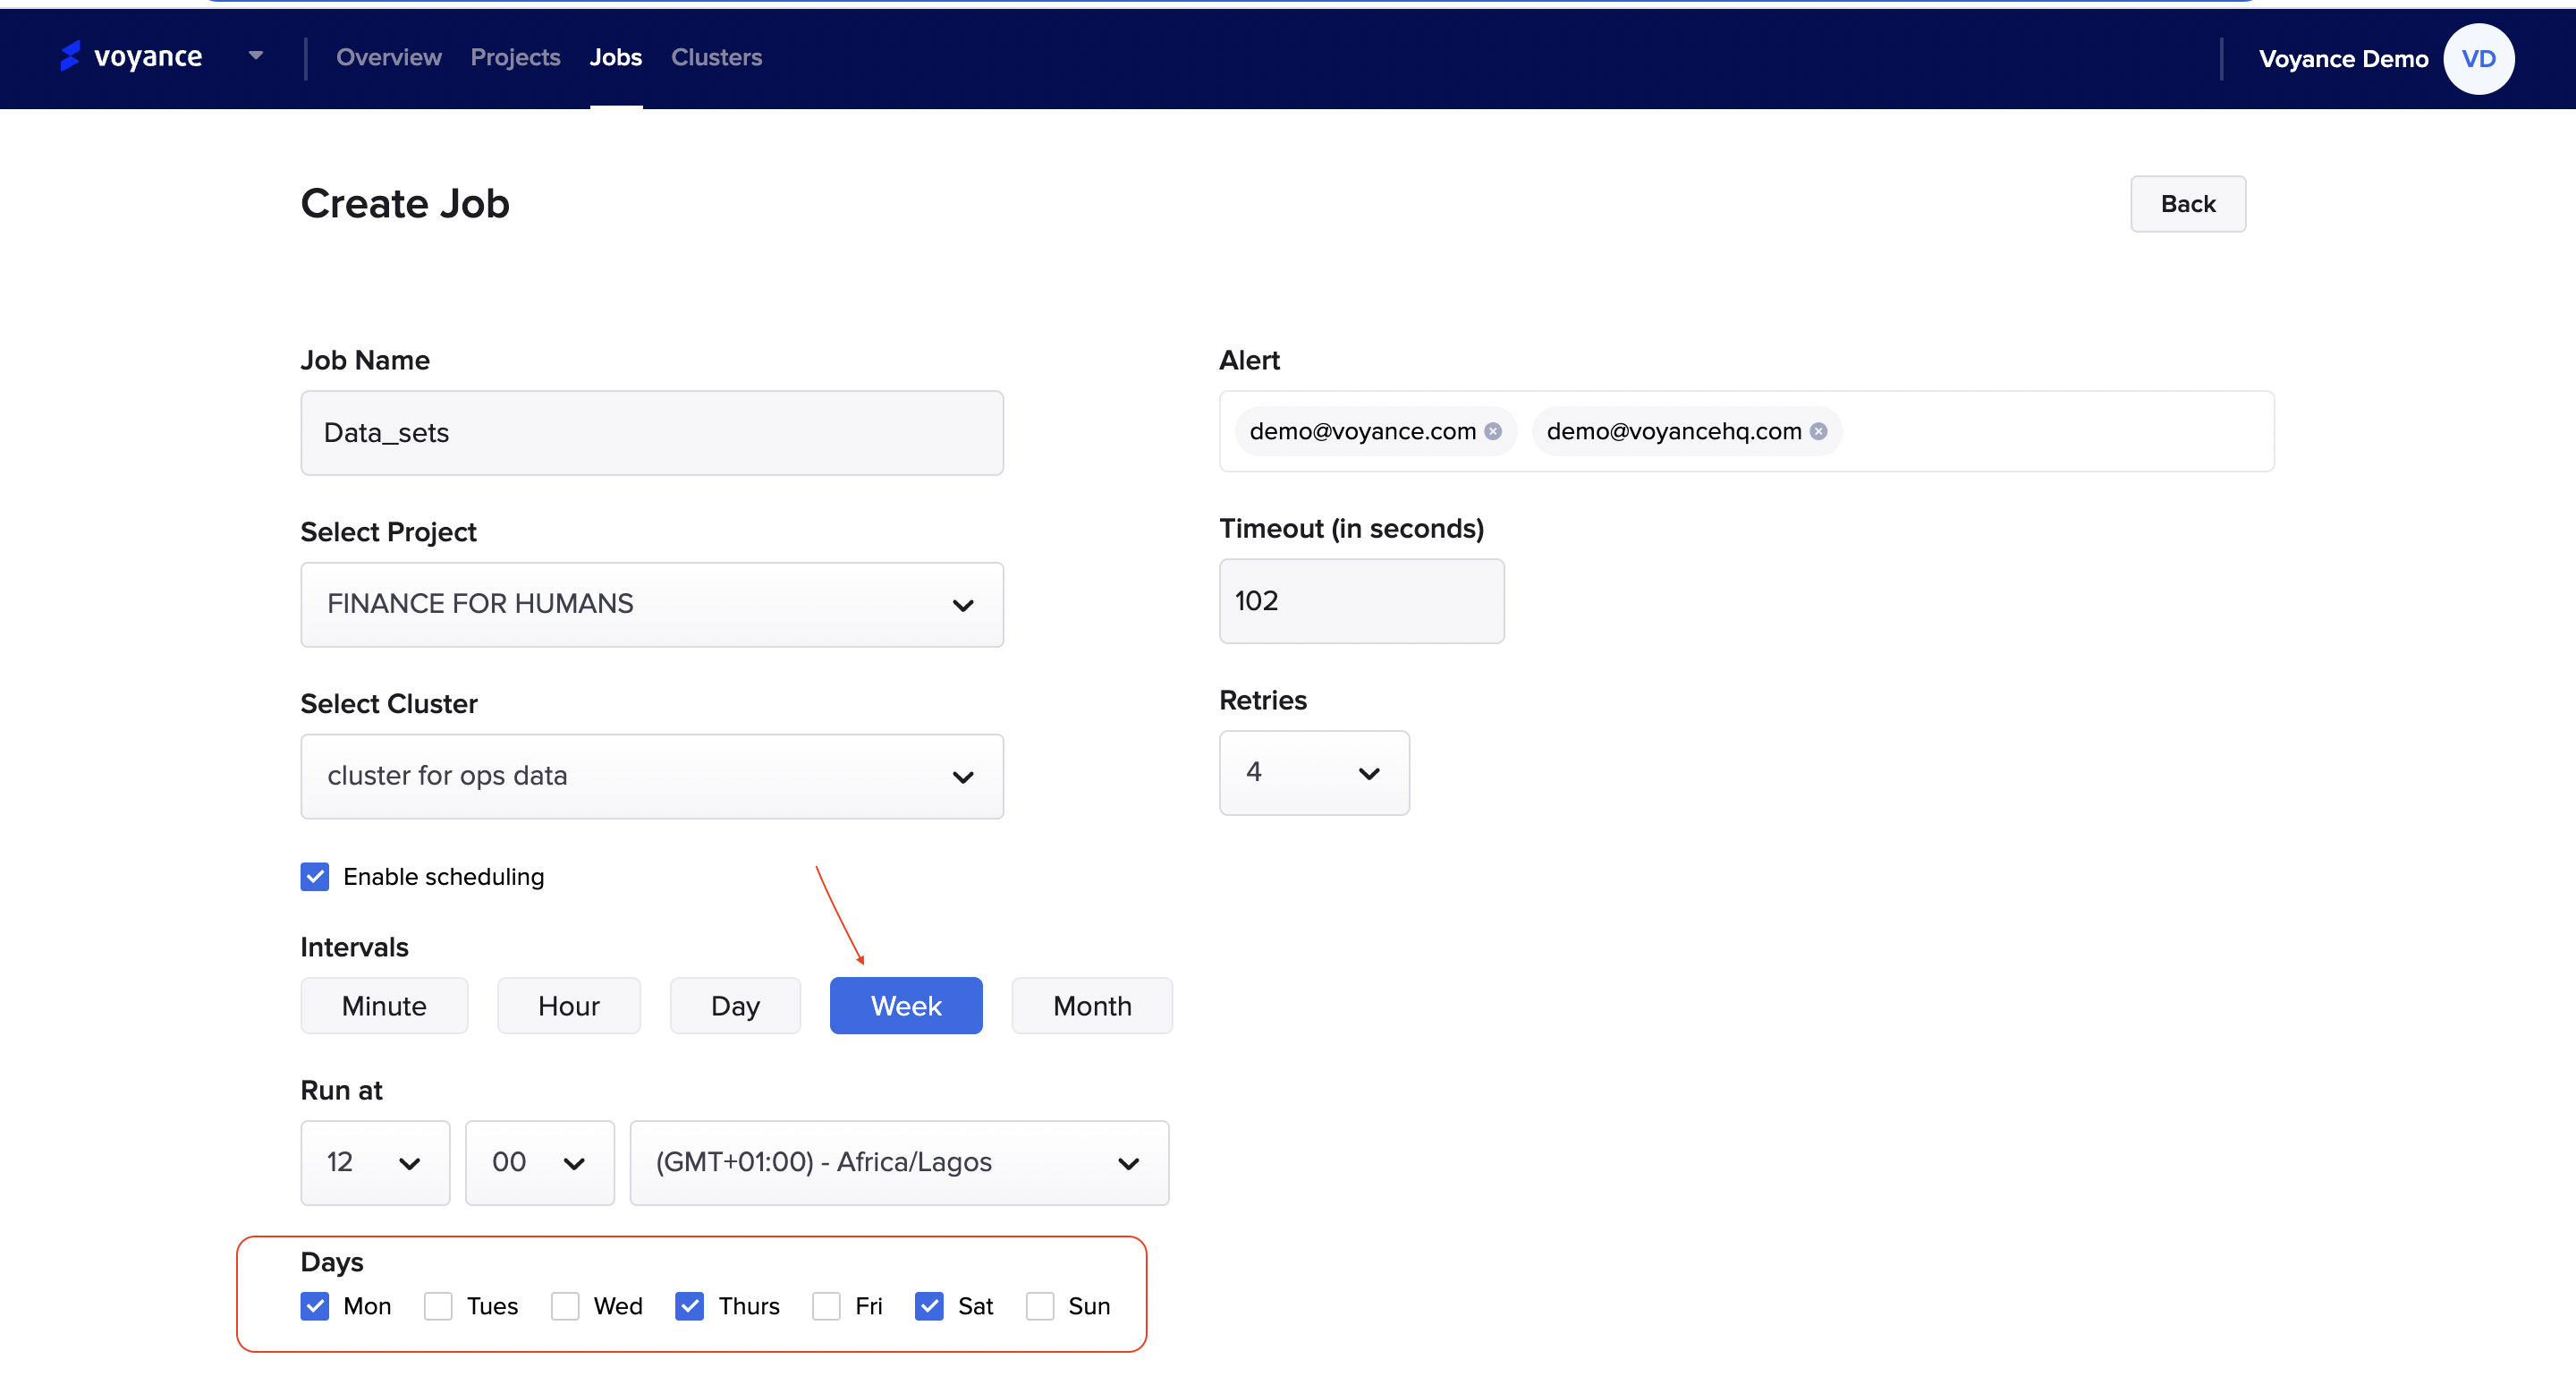
Week: Specify the days of the week you want your job to run at every schedule. Click on the "Week" tab and select the days you want the job to run without interference.
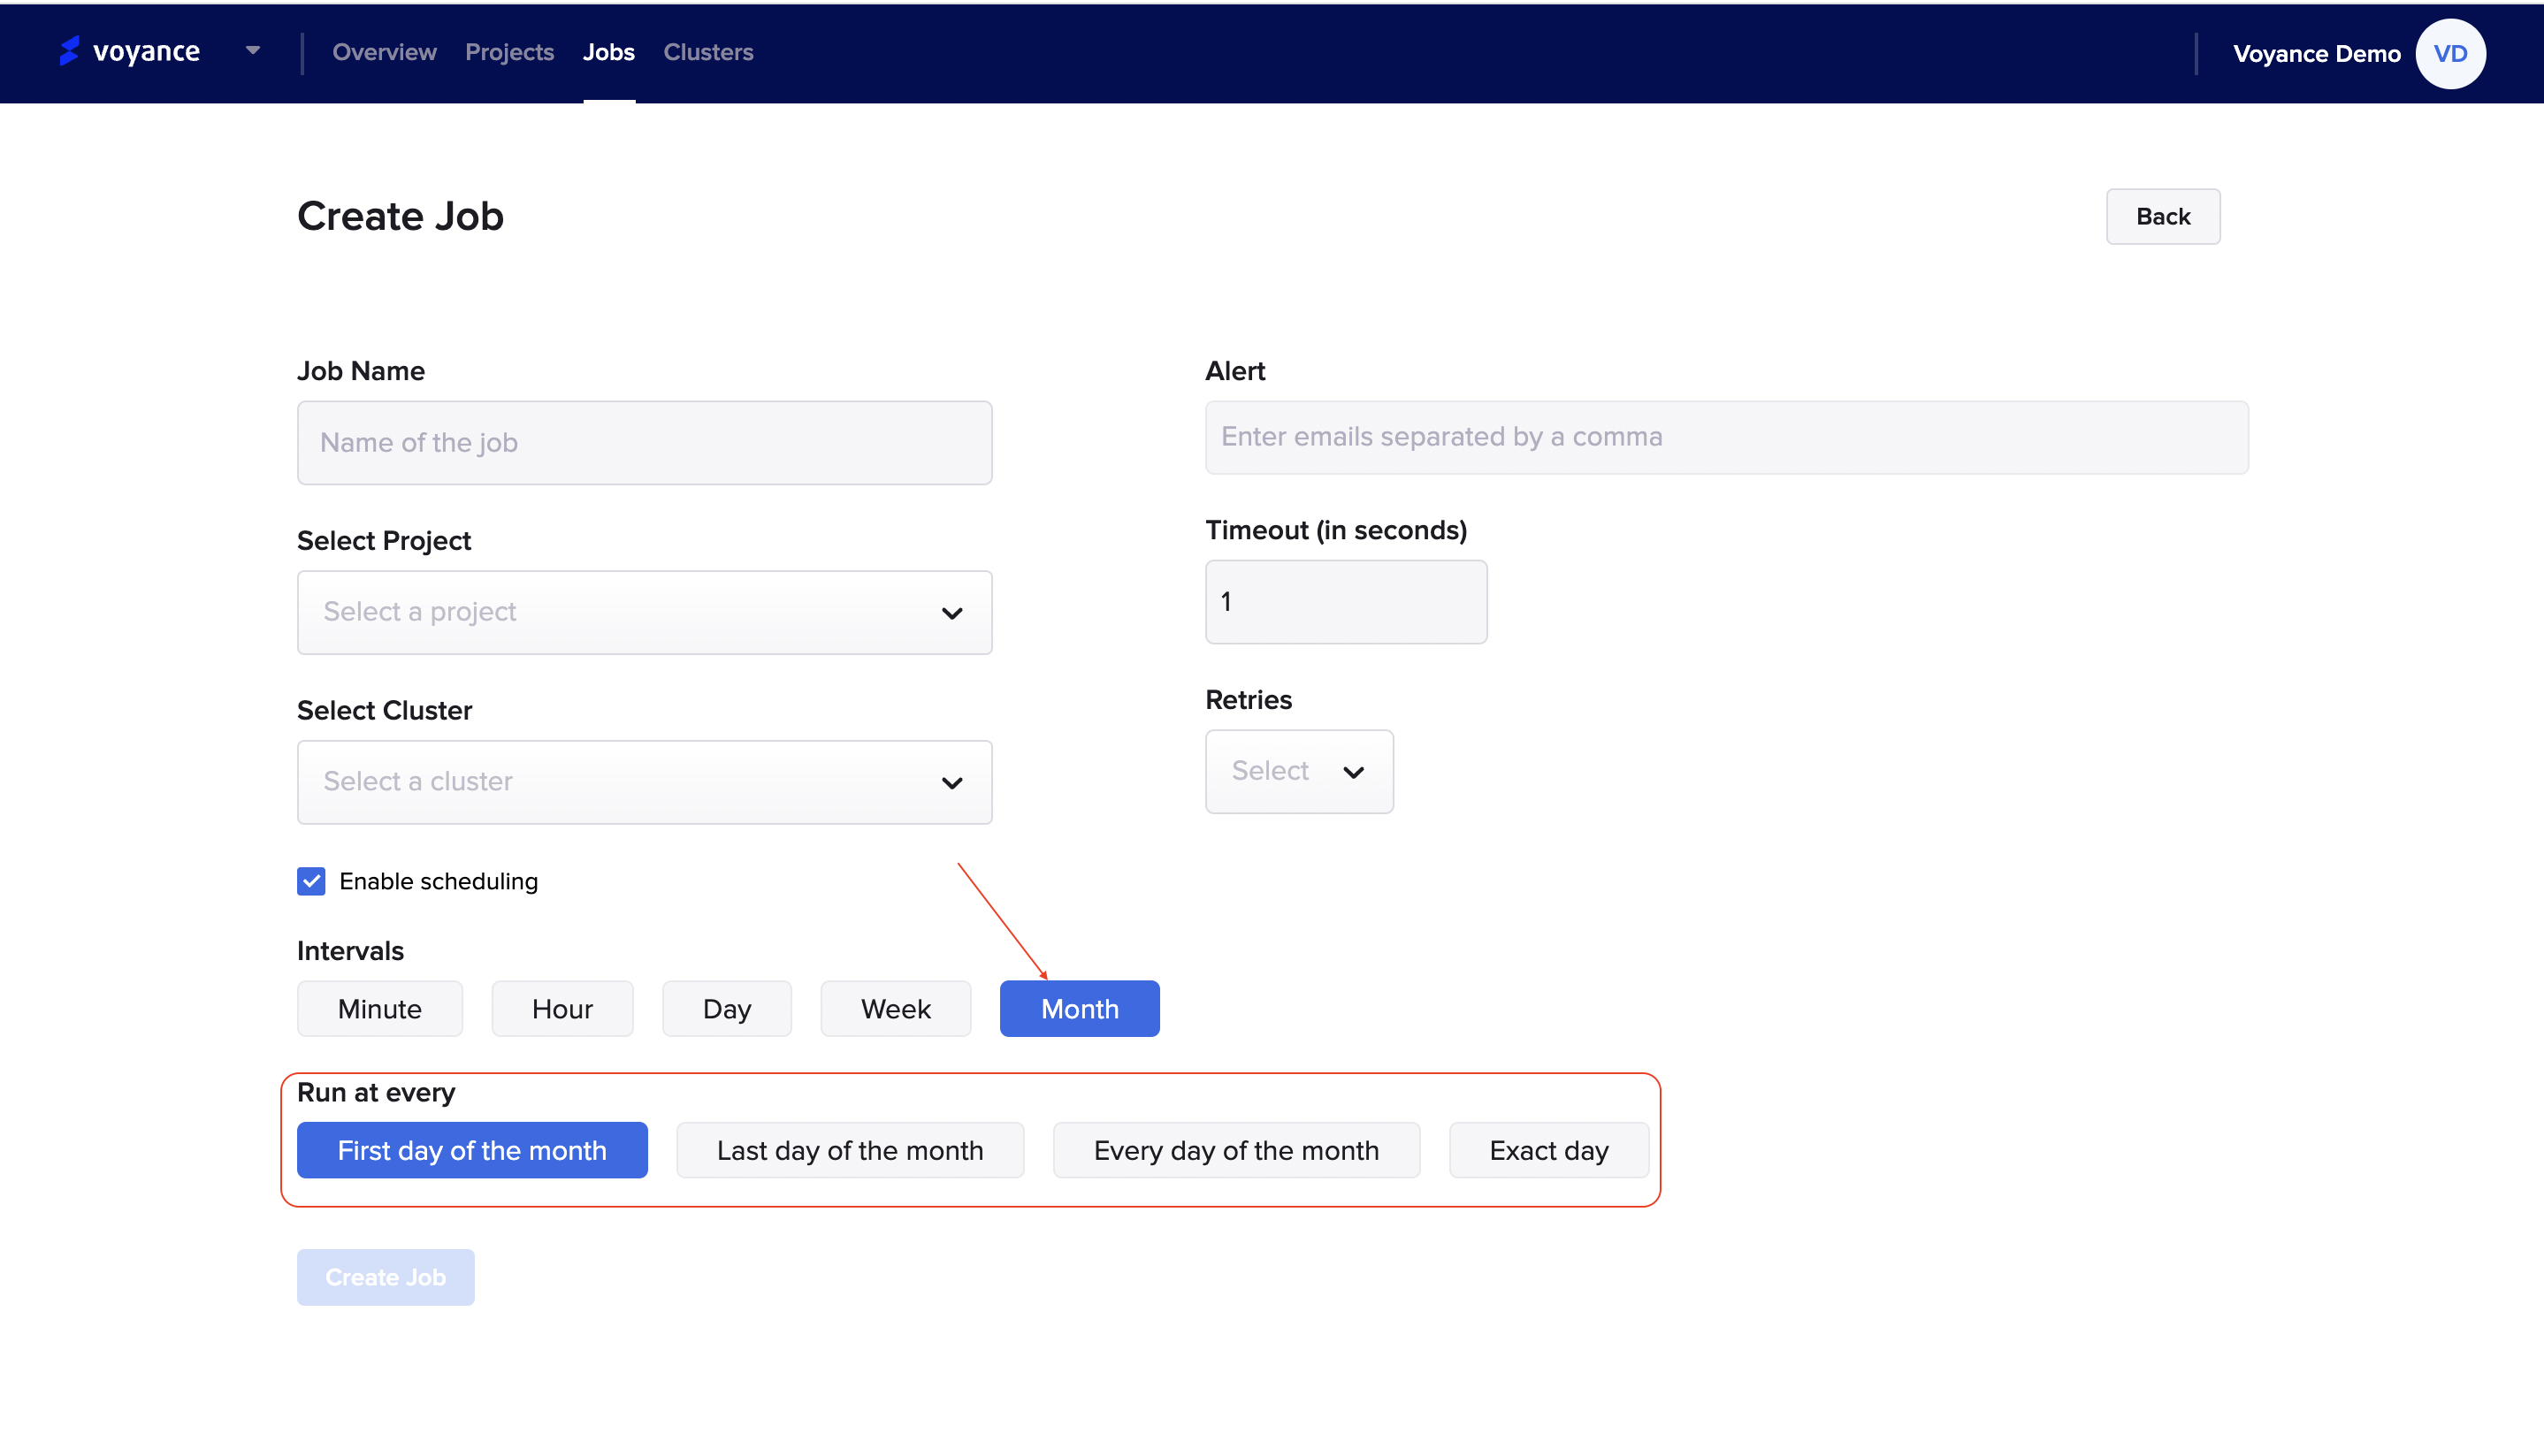
Month: specify the time of the month you want your job to run. Click on the "Month" tab and select the time of the month you want your job to run.
Then click "Create Job"
Manage Jobs
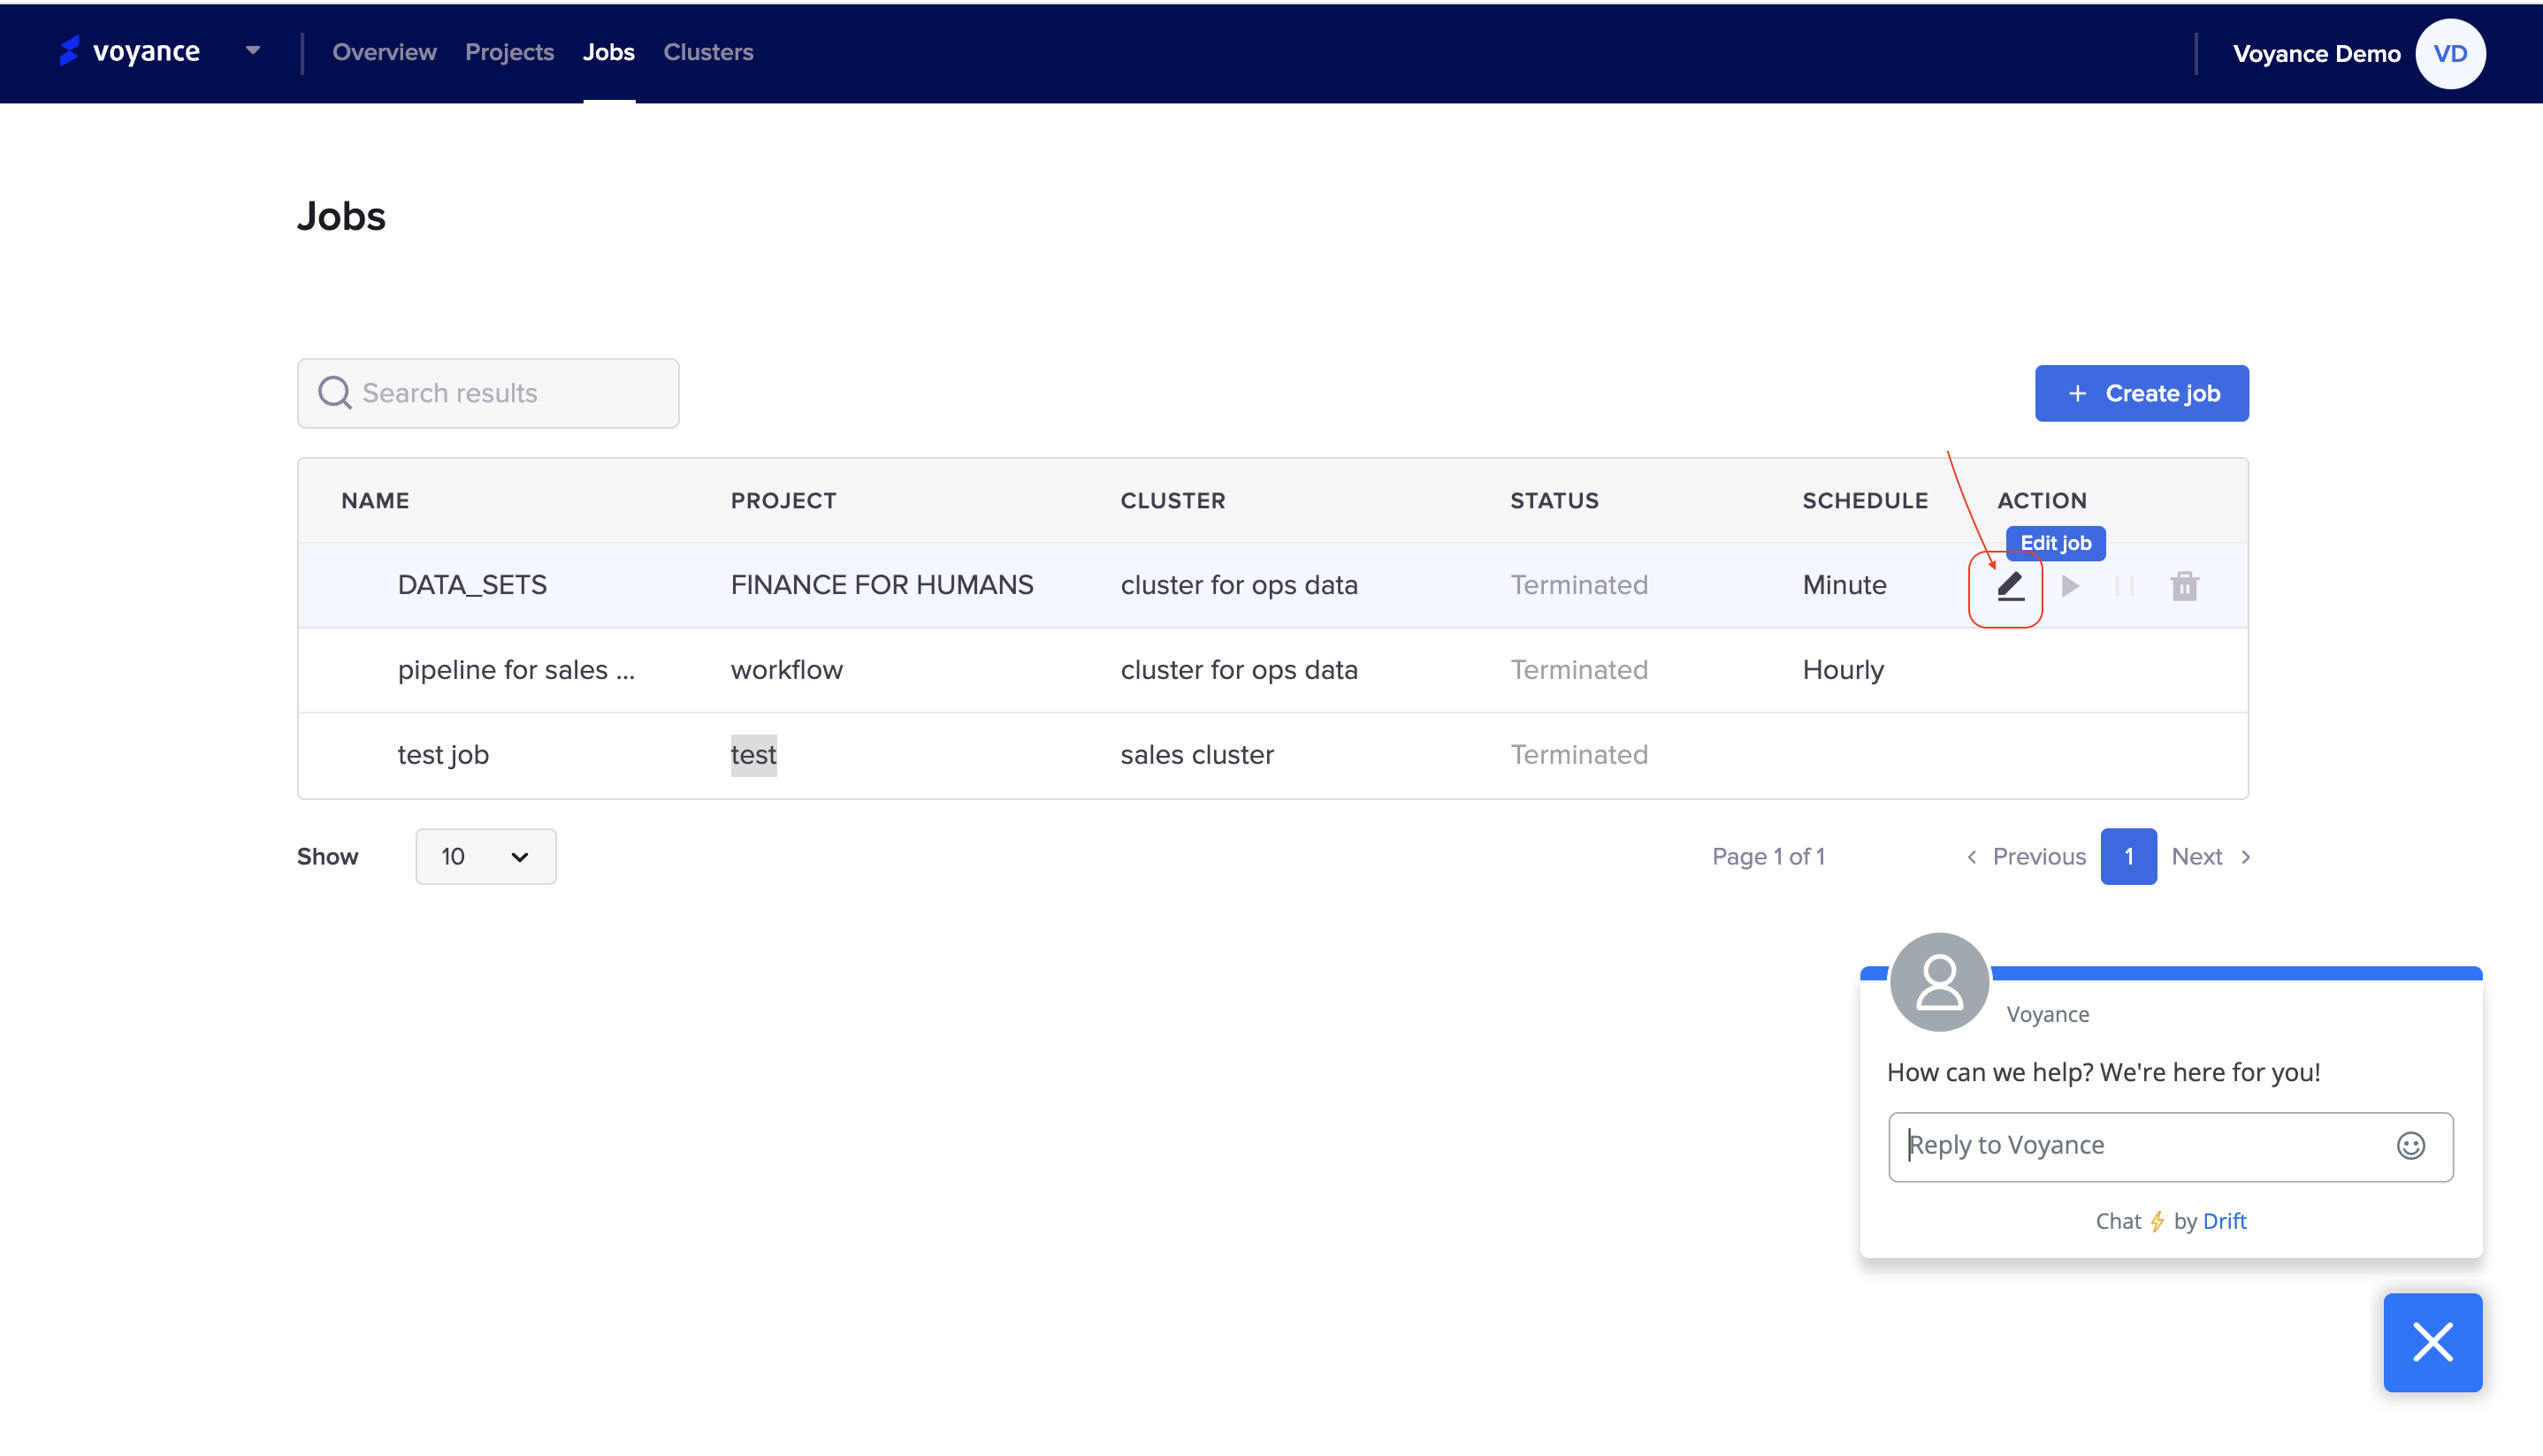
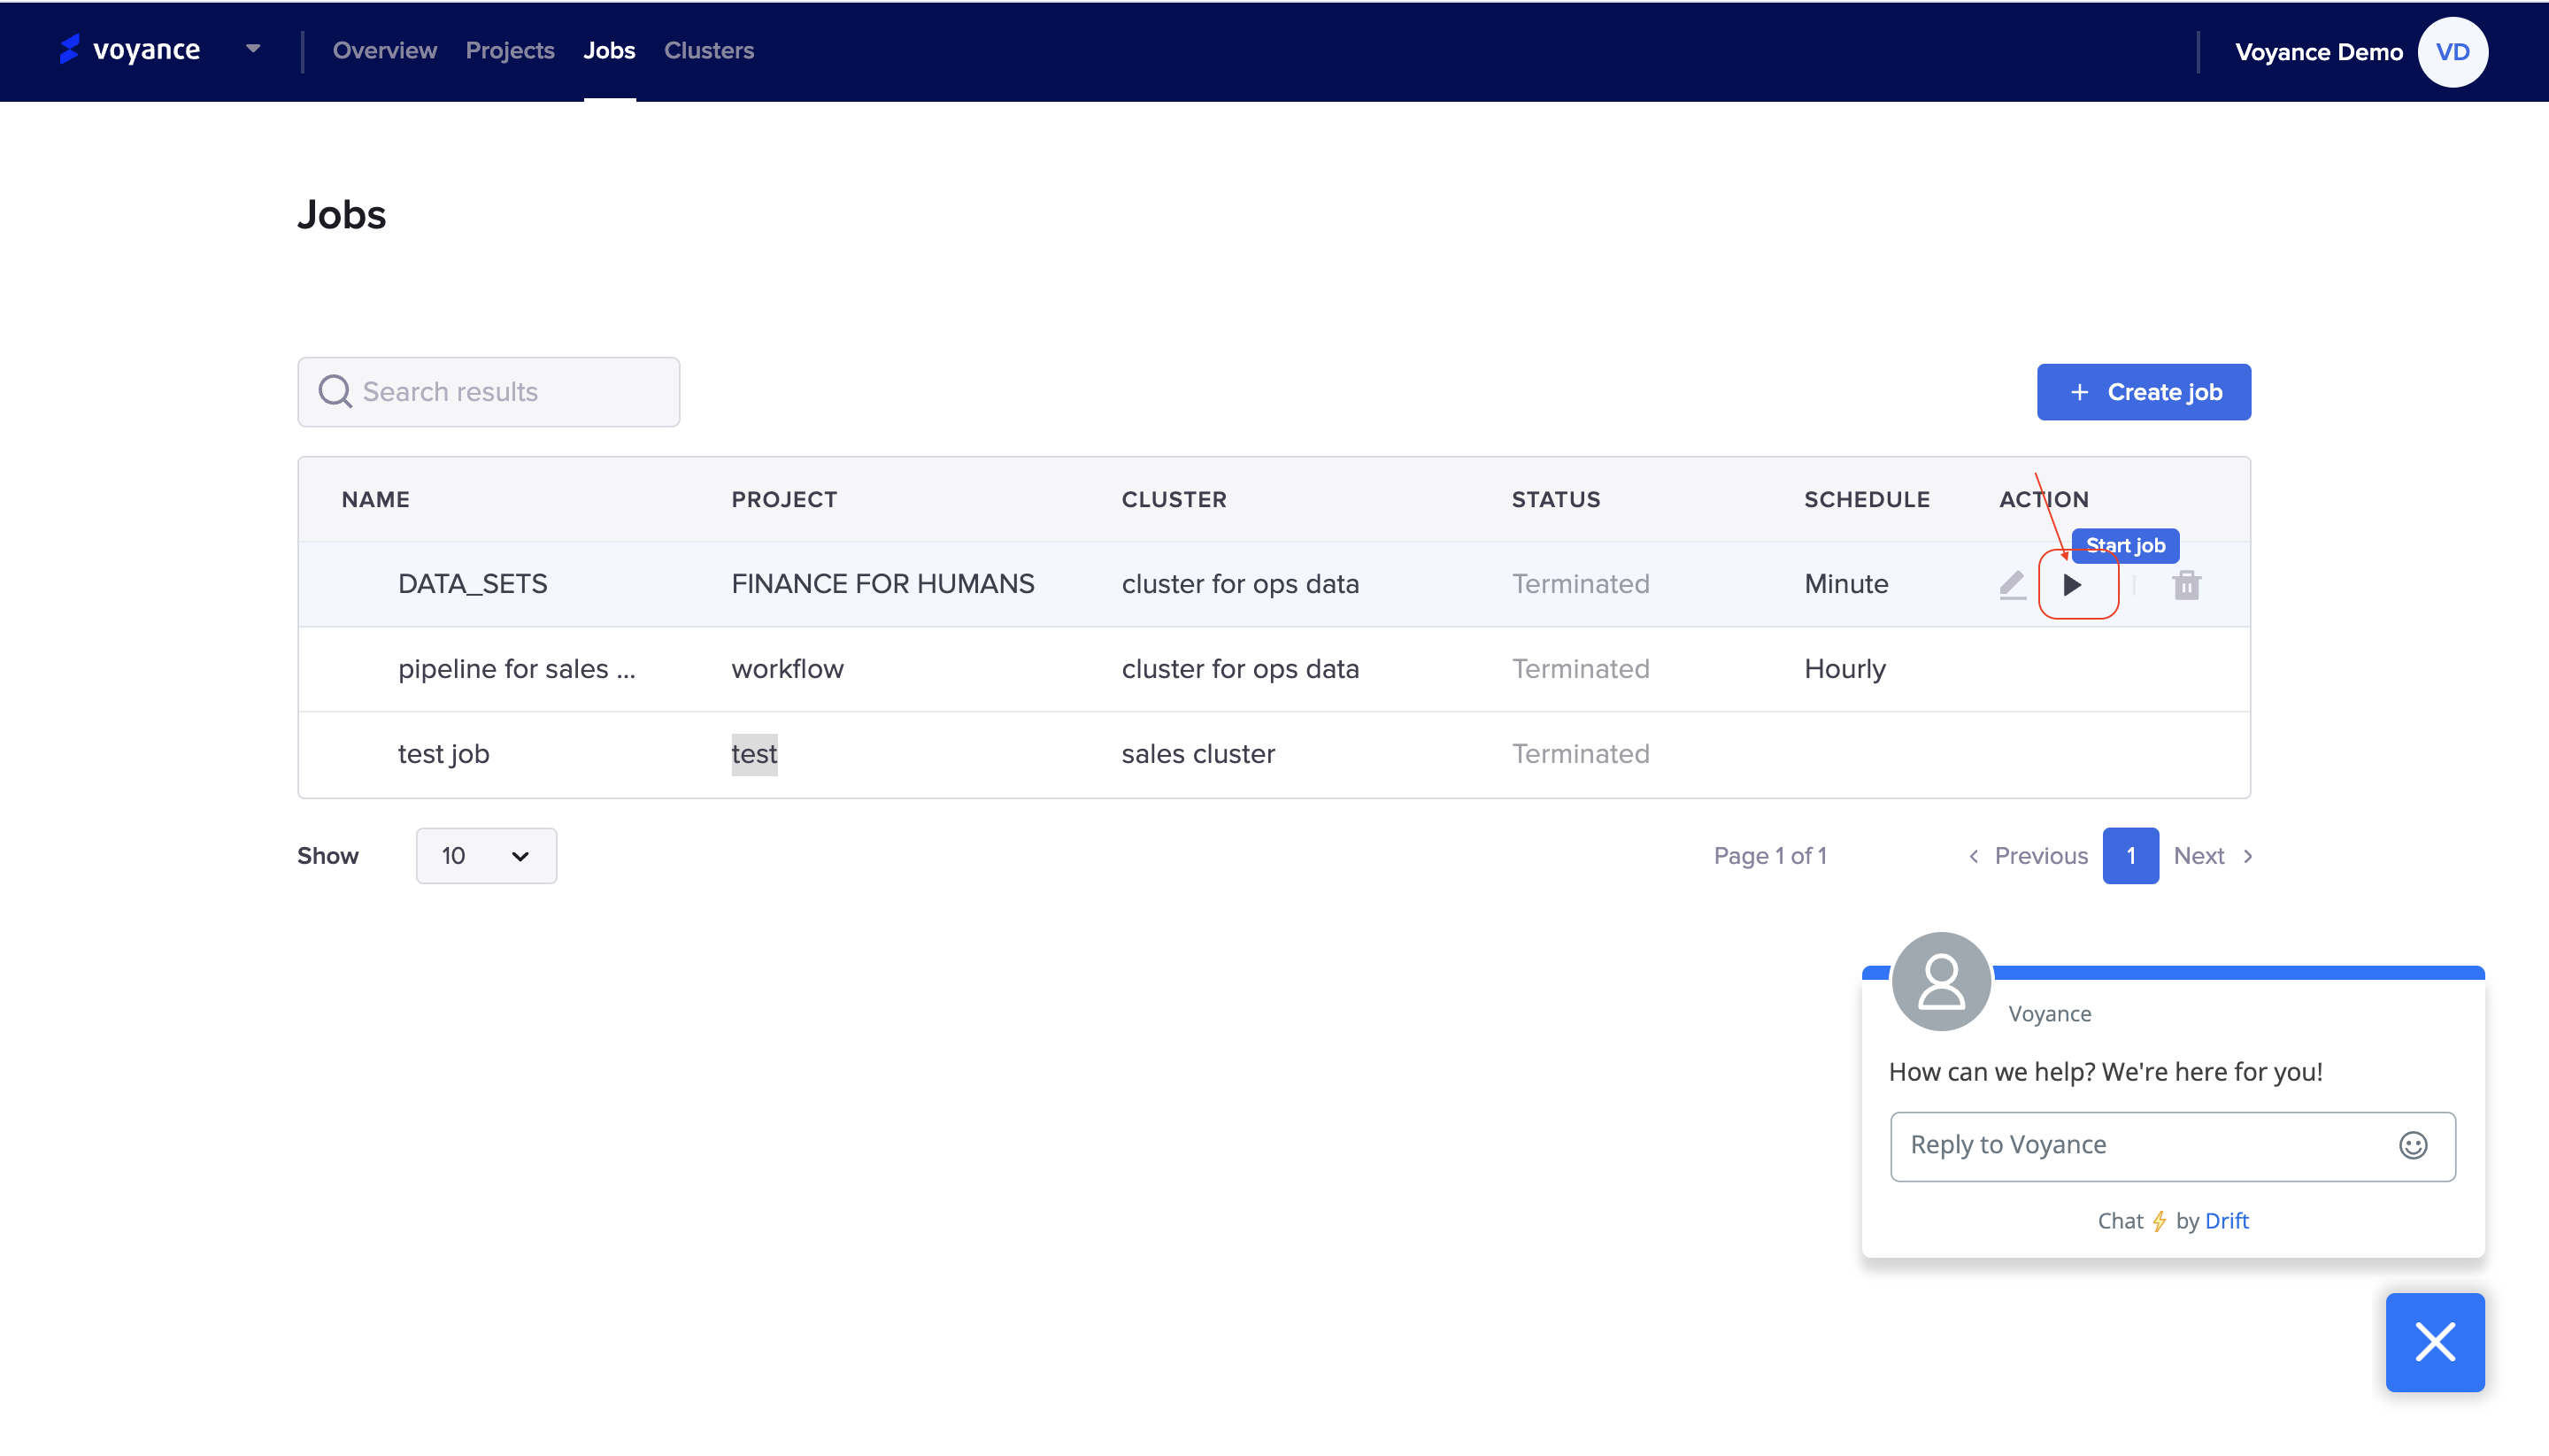
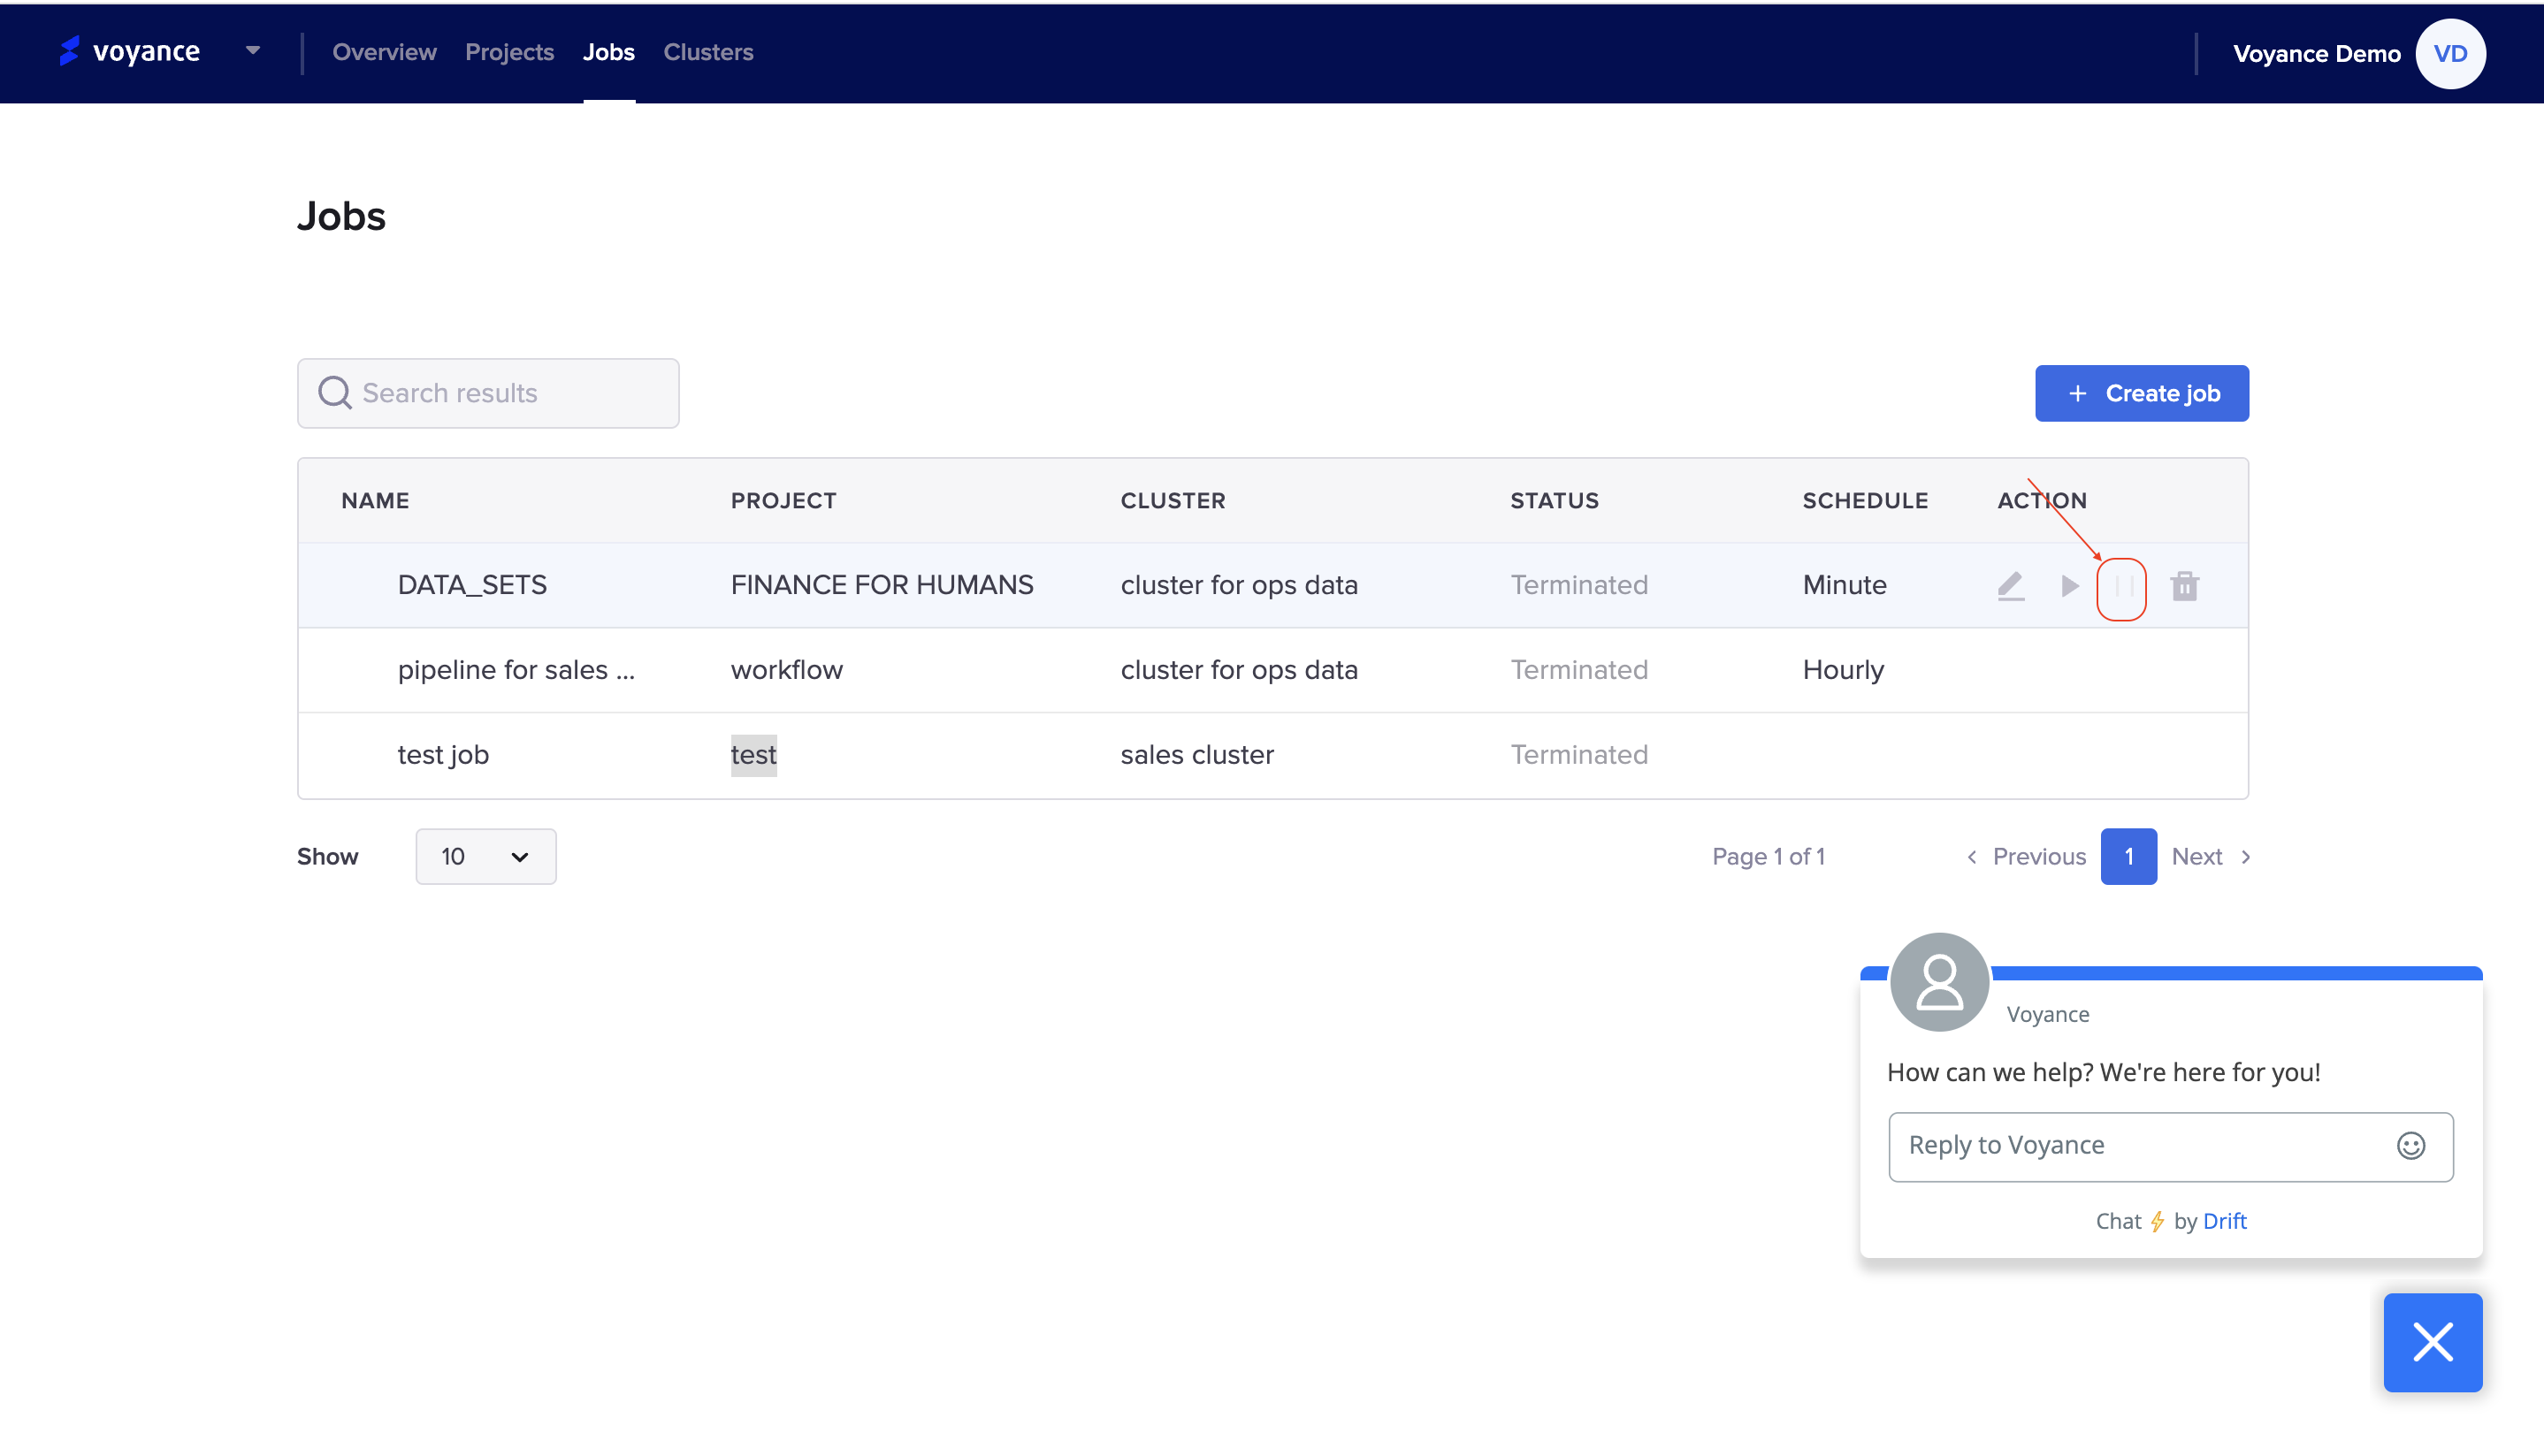
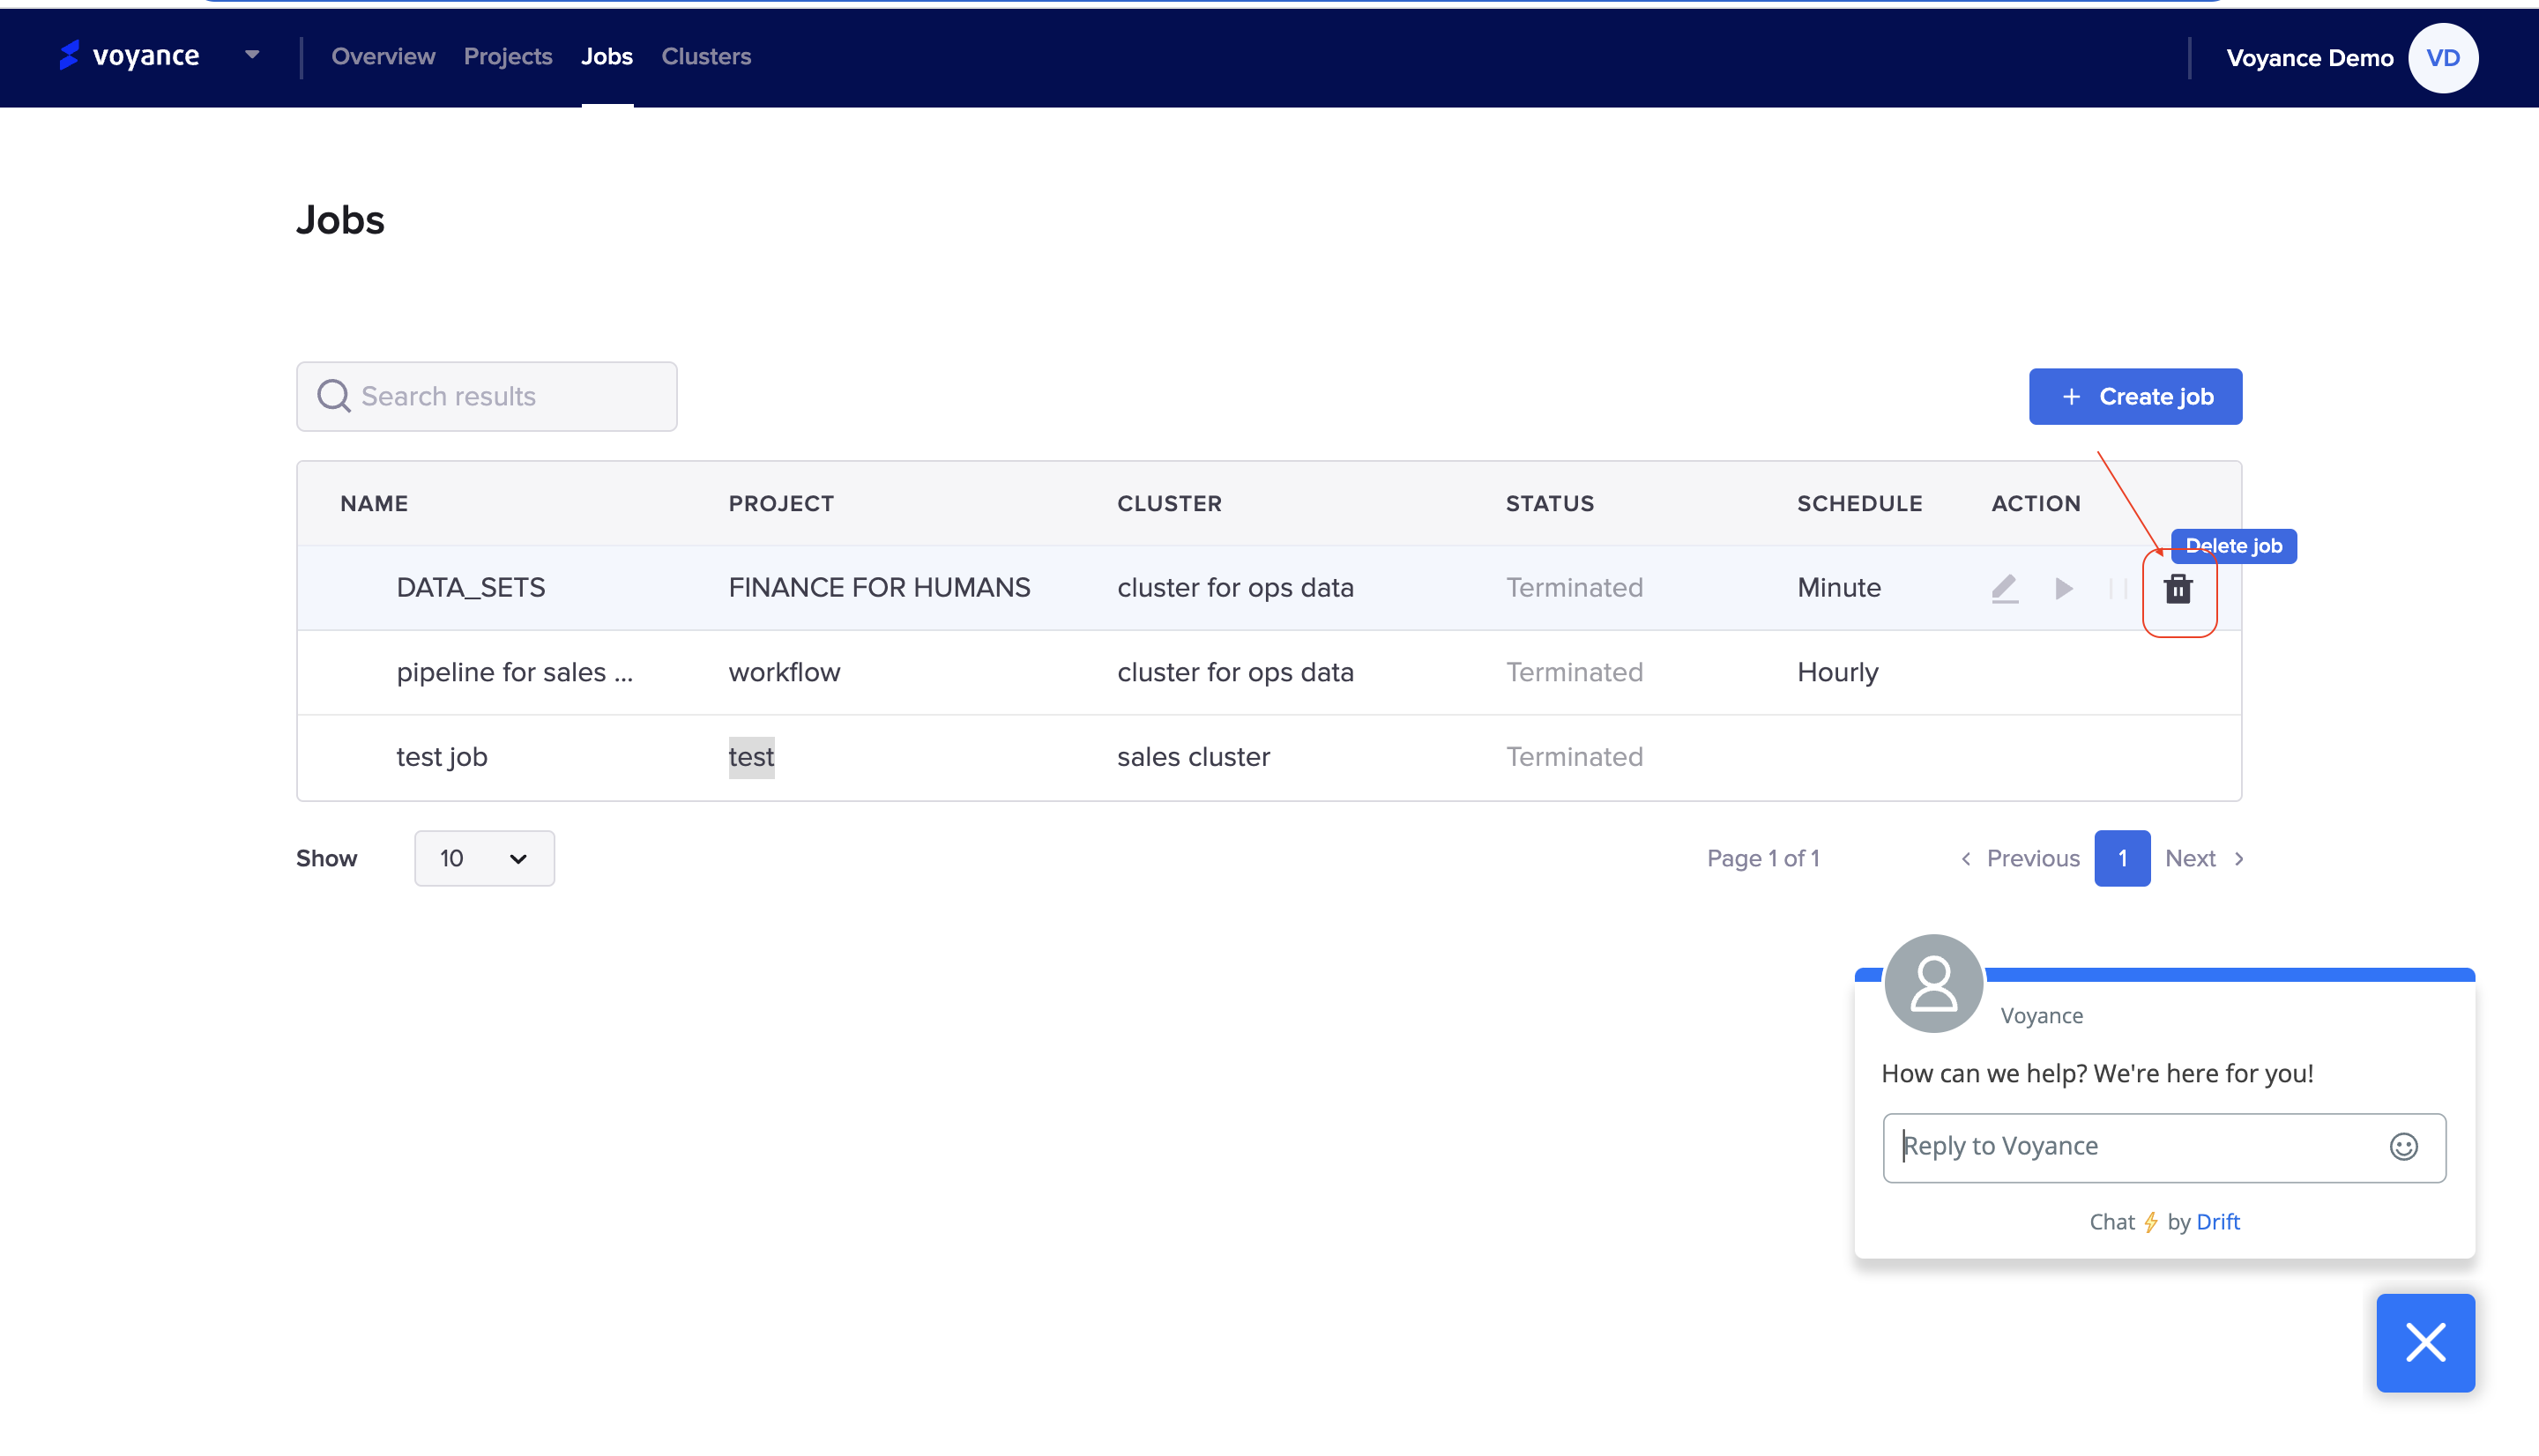
This section describes how to view and manage every job that has been created. Every job created can be viewed through the default list view. This section enables you to be able to perform certain processes to manage your jobs. you will be able to use the icons under the action tab to "Edit a job, Start. a job, Pause a Job and Delete a Job.
Edit Job
To edit a job you have created, click on “Edit Job icon” under the action tab and it takes you to the details of the job you want to edit. You can change the number of retries, alerts, timeout, cluster, project, name of the job and enable or disable scheduling for your job. After making all the necessary changes, click on “Edit Job” to submit changes.
Start a Job
To start the job, click on the “Start Job icon” on the Job list page under the action tab
Pause and Resume a Job
To pause or resume a job, click on the “Pause icon” on the job list page under the action tab.
Delete Job
To delete a job, click on the “Delete Job” on the job list page under the action tab
Search Jobs
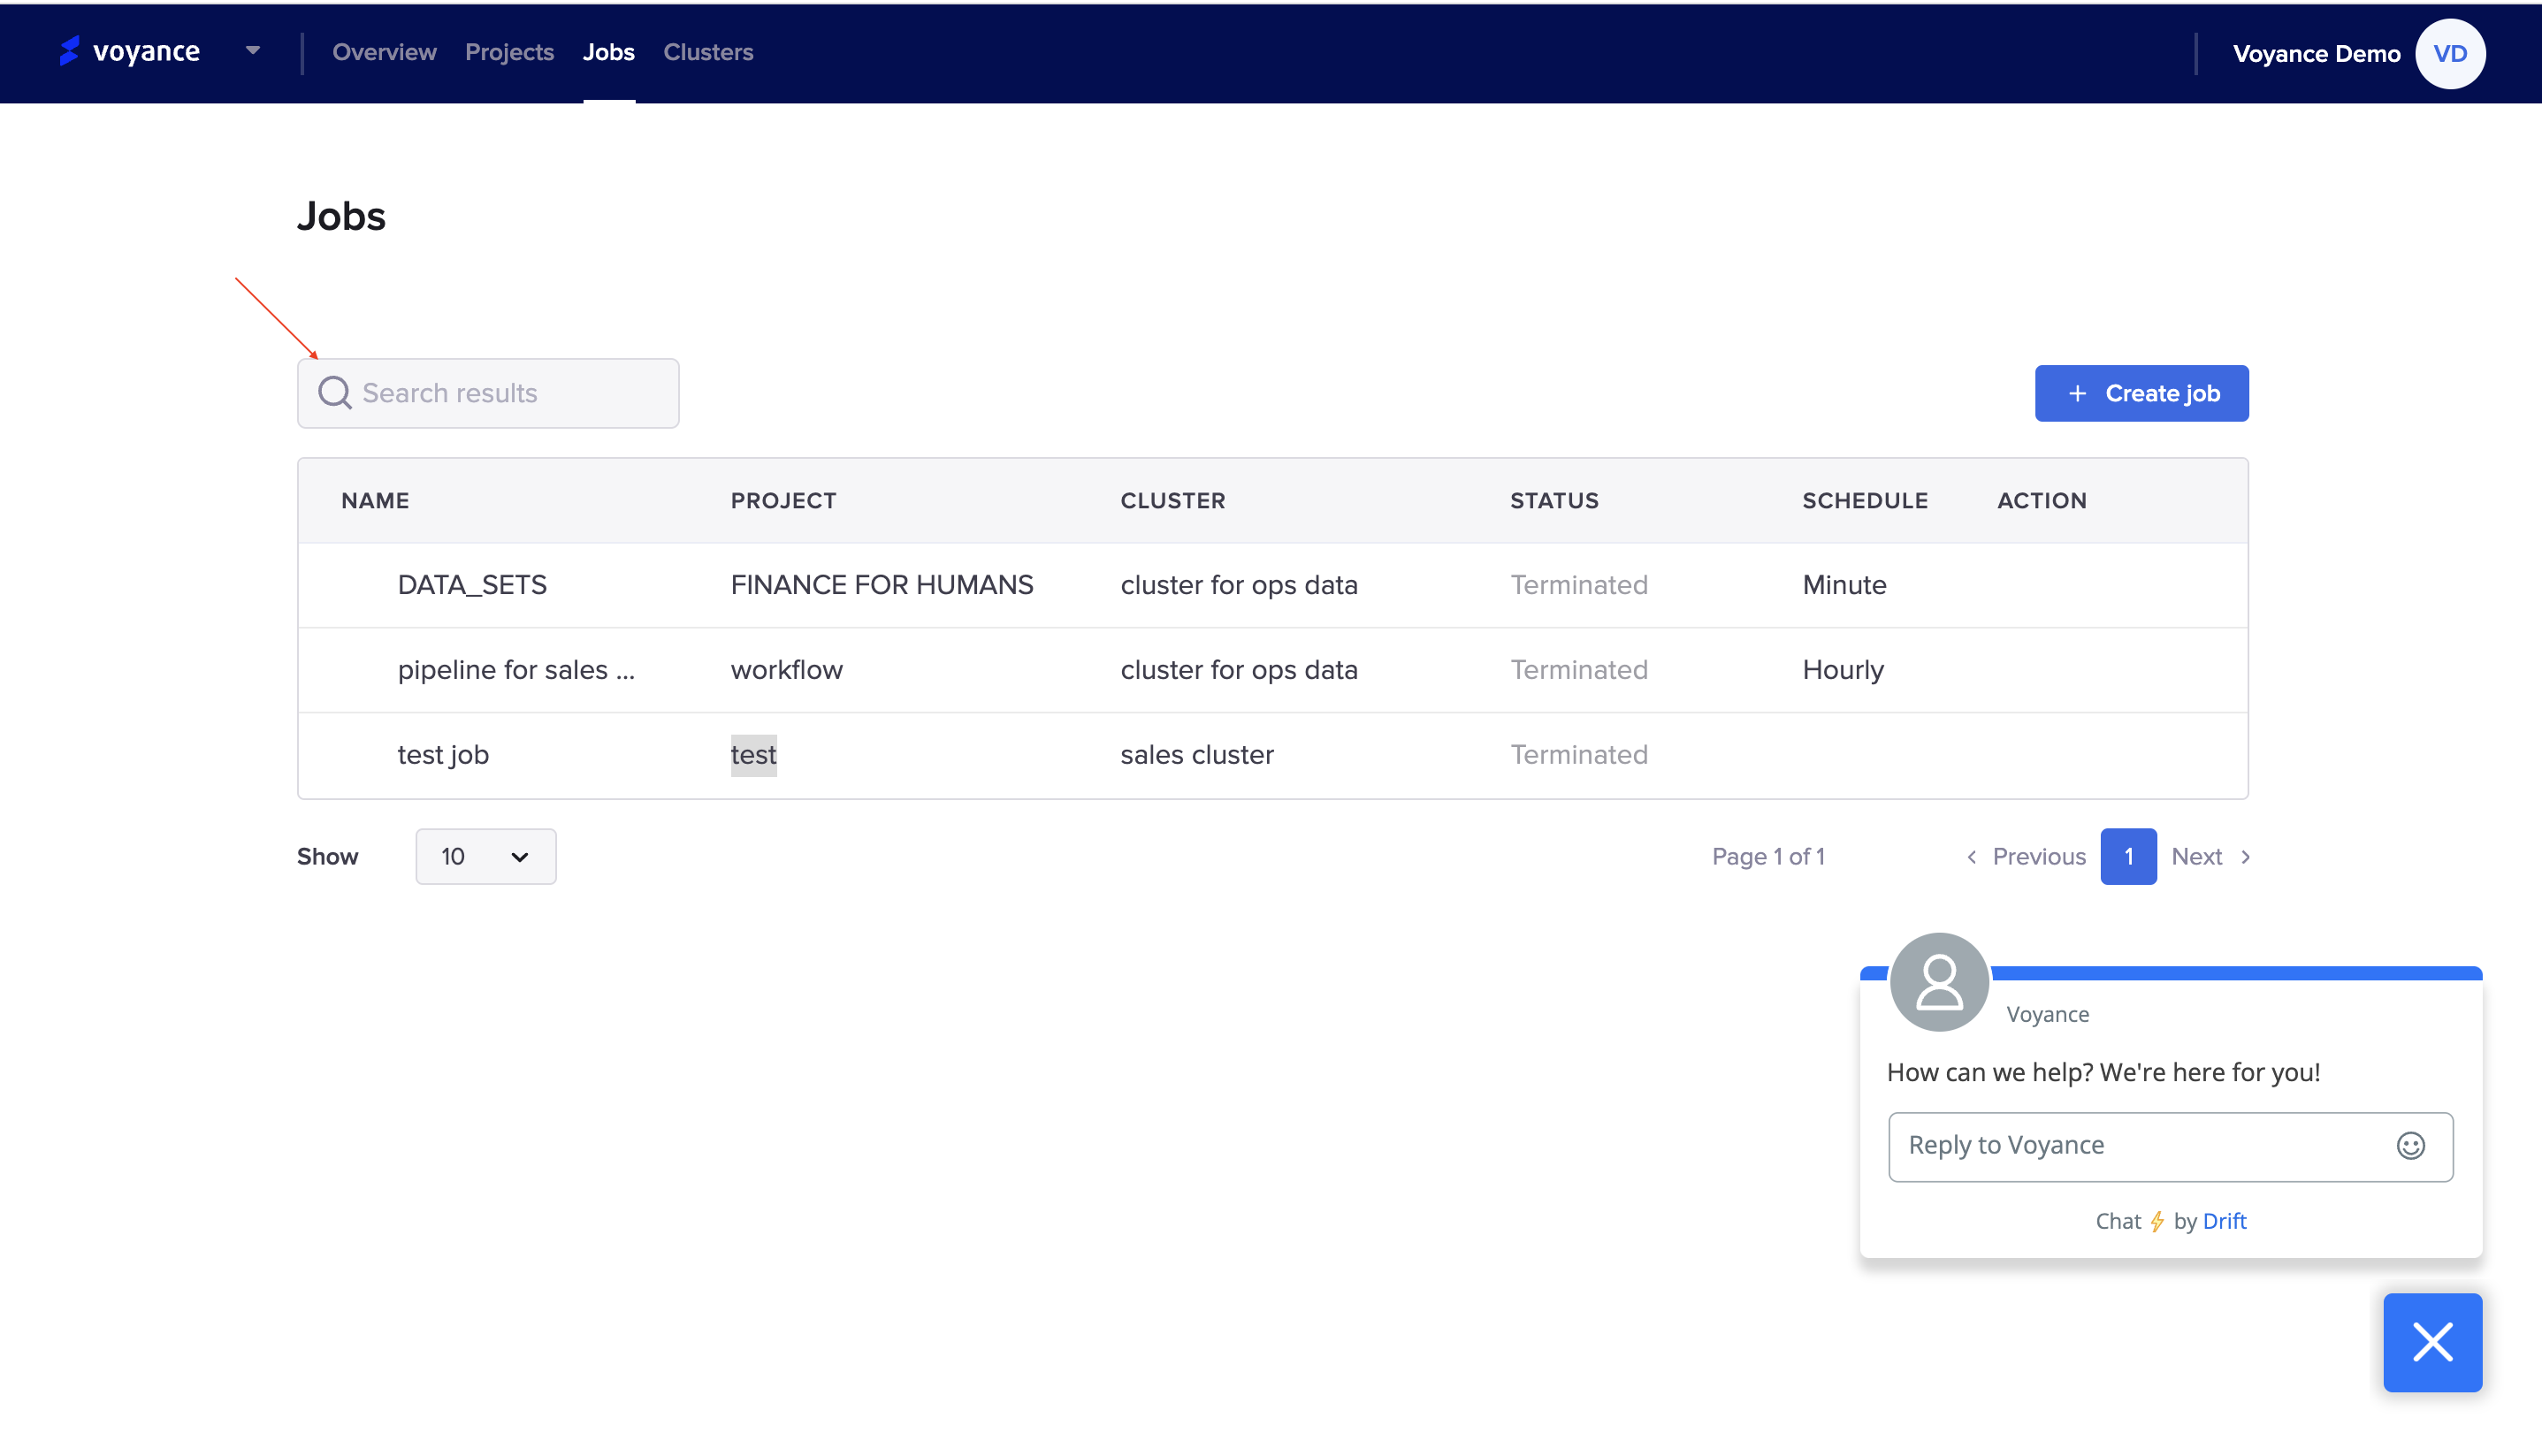
To search for a particular job, click on the search button at the top-left of the page and use the keyword or the name of the job to search for that particular job.
Updated almost 4 years ago
